Are you looking to create a peaceful and harmonious outdoor space on your balcony? Look no further than the ancient art of feng shui. By following these 10 feng shui tips, you can transform your balcony garden into a serene oasis that promotes relaxation and positive energy.
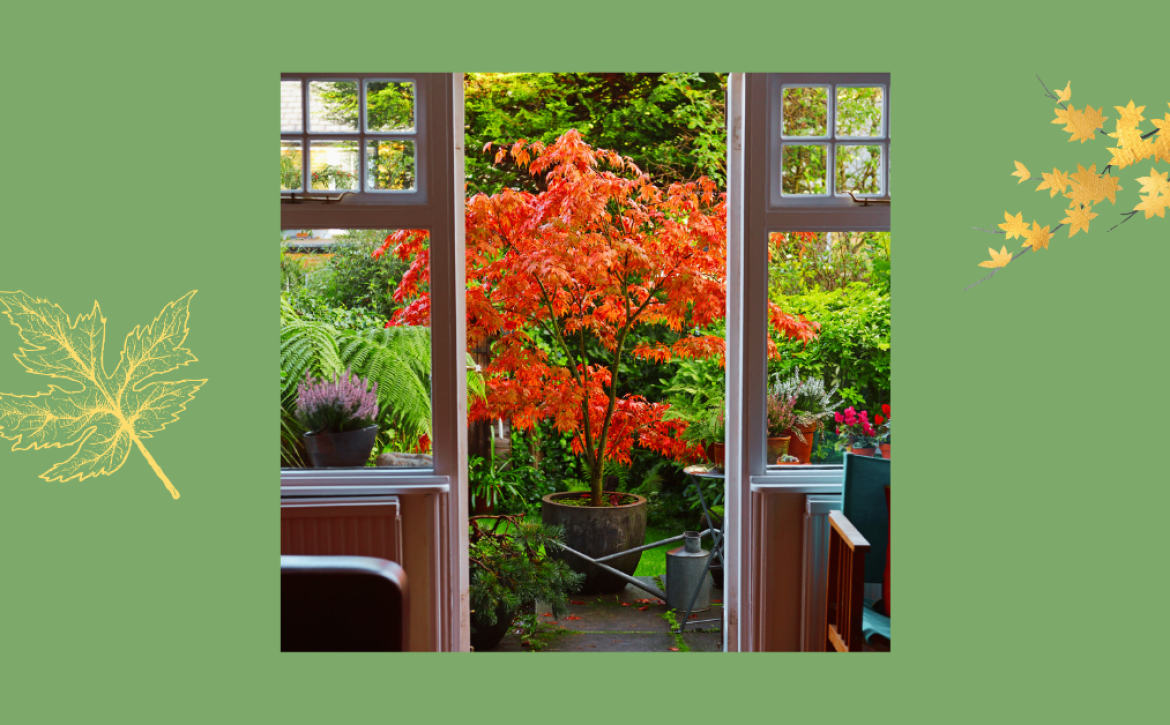
Add some Lucky Bamboo for that perfect touch of balcony garden feng shui.
When it comes to balcony garden feng shui, the plants you choose are key. Opt for plants with rounded or soft leaves, as they promote positive energy flow. Avoid plants with sharp or spiky leaves, as they can create negative energy. Additionally, choose plants that are healthy and vibrant, as they will bring more positive energy into your space.
Tip #2: Create a Balanced Layout
In feng shui, balance is essential. Create a symmetrical layout by placing matching planters or pots on either side of the balcony. You can also achieve a similar effect by using similar plants on both sides.
Tip #3: Incorporate Water Elements
Water is a powerful element in feng shui, as it represents wealth and abundance. Incorporating water elements into your balcony garden, such as a small fountain or birdbath, can help to promote positive energy flow and create a more harmonious space.
Tip #4: Use Color to Your Advantage
Color plays a significant role in feng shui, as different colors can promote a positive flow and create a more harmonious space. Consider incorporating colors that are soothing and calming, such as blues and greens, to create a peaceful and relaxing atmosphere in your balcony garden.
Tip #5: Remove Clutter
Clutter is a major hindrance to positive energy flow in feng shui. Keep your balcony garden tidy and organized by removing any unnecessary items or clutter. This will create a more peaceful and harmonious space.
Tip #6: Add Lighting
Good lighting is essential in feng shui, as it promotes positive energy flow and creates a more inviting atmosphere. Consider adding soft lighting to your balcony garden, such as string lights or lanterns, to create a warm and welcoming space.
Tip #7: Incorporate Natural Materials
Incorporating natural materials into your balcony garden, such as wood or stone, can help to promote positive energy flow and create a more harmonious space. Consider adding a wooden bench or stone pathway to your balcony garden to create a more natural and peaceful atmosphere.
Tip #8: Use Wind Chimes
Wind chimes are a popular feng shui cure, as they promote positive energy flow and create a more peaceful and harmonious space. Hang wind chimes in your balcony garden to create a soothing and relaxing atmosphere.
Tip #9: Add Artwork
Artwork is a powerful feng shui cure, as it can promote positive energy flow and create a more harmonious space. Consider adding artwork to your balcony garden, such as a painting or sculpture, to create a more inviting and peaceful atmosphere.
Tip #10: Keep Your Balcony Garden Maintained
Finally, it is important to keep your balcony garden well-maintained to promote positive energy flow and create a more harmonious space. Regularly prune your plants, sweep the floors, and remove any dead leaves or debris to keep your balcony garden looking its best.
Conclusion
By following these 10 feng shui tips, you can transform your balcony garden into a peaceful and harmonious outdoor space. Promote relaxation and positive and watch your life bloom. For more information related to this topic, check out some of our other blog articles:
Discover how Sweet Alyssum can transform your balcony garden with its delicate white flowers and sweet fragrance. Learn how to care for this easy-to-grow plant and create a beautiful outdoor space.
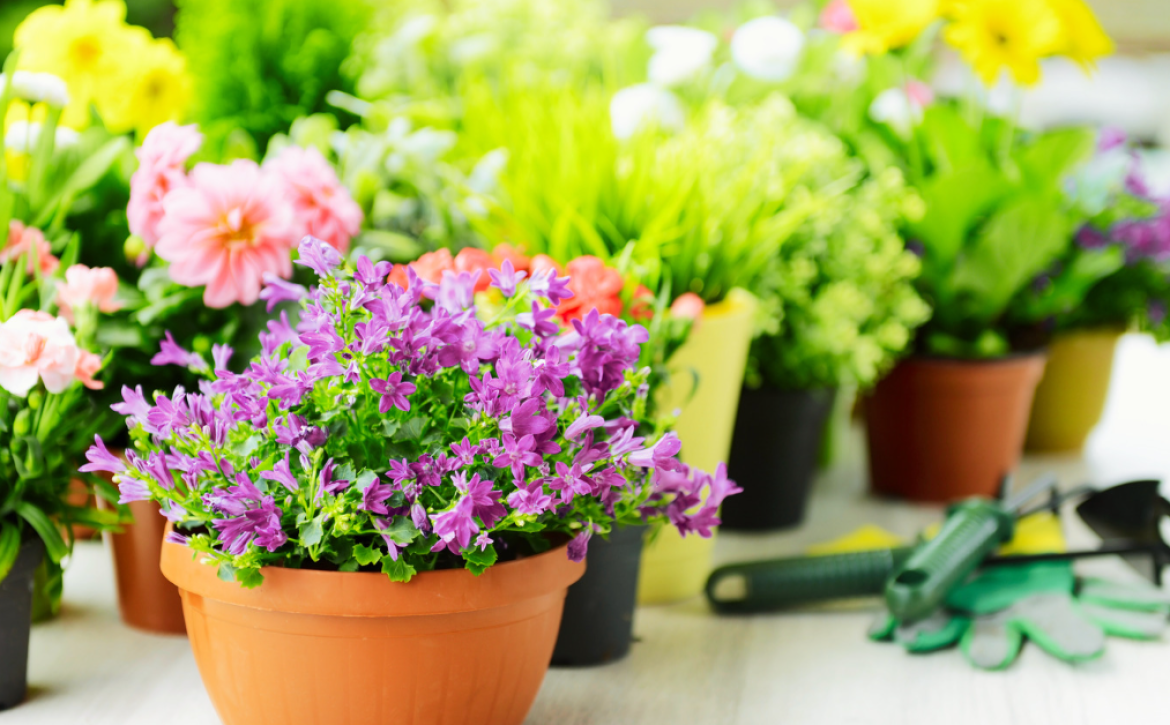
Learn how to create a stunning balcony garden with lavender. Discover tips and tricks for growing and caring for this fragrant herb that will add beauty and relaxation to your outdoor space.
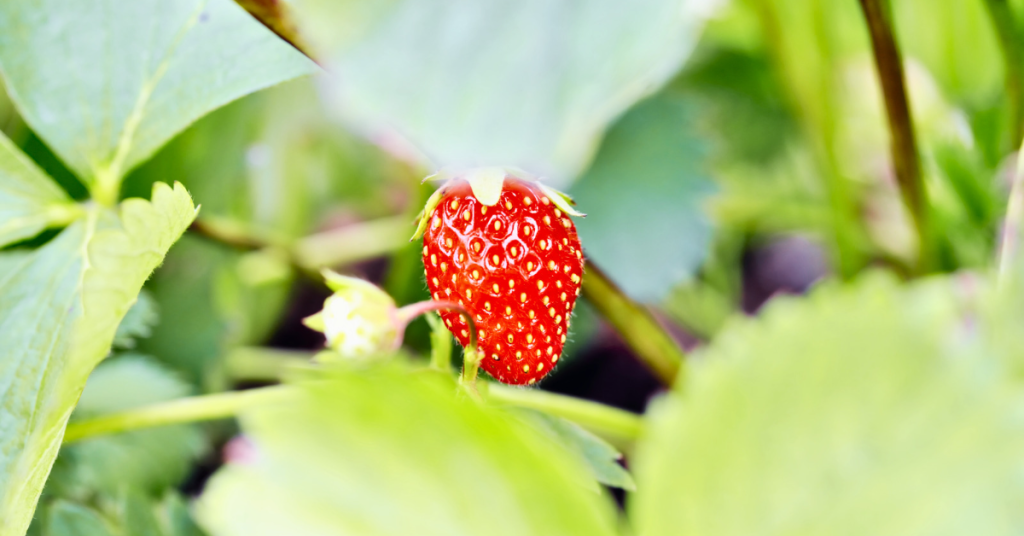
If you’re looking for a fun and rewarding way to grow your own fresh produce, consider starting a balcony garden with strawberries. Not only do strawberries produce delicious fruit, but they are also well-suited to growing in small spaces and require very little maintenance. With the right techniques and a little bit of care, you can enjoy juicy, sweet strawberries all season long.
There are many benefits to growing strawberries in a balcony garden. For one, they are easy to care for and require minimal space. Additionally, they are rich in vitamin C and antioxidants, making them a healthy addition to your diet. With a few simple steps, you can start growing your own strawberries and enjoy the taste of fresh, homegrown fruit all summer long.
Key Takeaways
Balcony gardens are a great way to grow your own fresh produce, including strawberries.
Choosing the right variety of strawberries and preparing your balcony garden properly are key to a successful harvest.
With the right care and maintenance, you can enjoy juicy, sweet strawberries from your balcony garden all season long.
Benefits of Balcony Garden Strawberries
Growing strawberries in a balcony garden has numerous benefits. Here are some of the benefits of having a balcony garden:
Fresh, Organic Produce
One of the biggest benefits of having a balcony garden is the availability of fresh, organic produce. By growing your own strawberries, you can ensure that the fruit is free from harmful chemicals and pesticides. Plus, you can pick the strawberries at the peak of ripeness, ensuring maximum flavor and nutrition.
Saves Money
Growing your own strawberries in a balcony garden can also save you money in the long run. By eliminating the need to purchase strawberries from the grocery store, you can save money on your grocery bill. Plus, you can grow other fruits and vegetables in your balcony garden, further reducing your grocery expenses.
Aesthetic Appeal
A balcony garden can also add aesthetic appeal to your home. With a variety of plants and flowers, you can create a beautiful and inviting space on your balcony. Plus, the sight and smell of fresh strawberries can be a delightful addition to your balcony garden.
Stress Relief
Gardening has been shown to have stress-relieving benefits. By tending to your balcony garden, you can reduce stress and anxiety, improve your mood, and promote overall well-being.
In conclusion, a balcony garden can provide numerous benefits, including fresh, organic produce, cost savings, aesthetic appeal, and stress relief. By growing your own strawberries in a balcony garden, you can enjoy all of these benefits and more.
Choosing the Right Strawberry Varieties
When it comes to growing strawberries on your balcony, choosing the right variety is essential. With so many different types of strawberries available, it can be challenging to know which ones will work best for your balcony garden.
Here are some factors to consider when selecting strawberry varieties for your balcony garden:
1. Space and Pot Size
The first thing to consider is the space you have available on your balcony and the size of the pots you plan to use. Some strawberry varieties, such as Alpine strawberries, are compact and can be grown in small pots. Other varieties, such as June-bearing strawberries, require more space and larger pots to grow successfully.
2. Climate
Another important factor to consider is your climate. Some strawberry varieties, such as Everbearing strawberries, are better suited for cooler climates, while others, such as Day-neutral strawberries, can thrive in warmer temperatures.
3. Yield and Fruit Size
Consider the yield and size of the fruit when selecting strawberry varieties. June-bearing strawberries typically produce larger fruit, while Everbearing and Day-neutral strawberries produce smaller fruit but over a more extended period.
4. Taste and Flavor
Finally, consider the taste and flavor of the strawberries you plan to grow. Some varieties, such as Chandler strawberries, are known for their sweet flavor, while others, such as Seascape strawberries, have a more tangy taste.
Overall, the best strawberry varieties for your balcony garden will depend on your specific needs and preferences. Take the time to research different varieties and choose the ones that are best suited for your balcony garden. With the right variety, you can enjoy fresh, delicious strawberries right from your balcony all season long.
Preparing Your Balcony Garden for Strawberries
Growing strawberries on a balcony is a fun and rewarding project that can yield delicious fruit right outside your door. However, before planting your strawberries, it’s important to prepare your balcony garden properly. Here are some tips to help you get started.
Assess Your Balcony’s Sunlight
Strawberries need at least six hours of direct sunlight per day to thrive. Before planting your strawberries, assess your balcony’s sunlight exposure. Observe how much sunlight your balcony receives throughout the day and determine the best location for your strawberry plants. If your balcony doesn’t get enough sunlight, consider using grow lights to supplement the natural light.
Choose the Right Containers
Strawberries can be grown in a variety of containers, including pots, hanging baskets, and window boxes. When choosing containers, make sure they have drainage holes to prevent water from accumulating in the soil. Also, the containers should be large enough to accommodate the roots of the strawberry plants and allow for proper drainage.
Select the Right Soil
Strawberries prefer well-draining soil that is rich in organic matter. Choose a potting mix that is specifically formulated for container gardening, or make your own by combining equal parts of peat moss, vermiculite, and perlite. Additionally, you can add compost or aged manure to the soil to provide additional nutrients.
Consider Companion Planting
Companion planting is a gardening technique that involves planting different plants together to benefit each other. Consider planting companion plants with your strawberries, such as herbs or flowers, to help repel pests and attract beneficial insects.
By following these tips, you can prepare your balcony garden for strawberries and set yourself up for a successful harvest. With a little bit of planning and care, you can enjoy fresh, juicy strawberries right from your balcony.
Planting and Caring for Your Strawberry Plants
When it comes to planting and caring for your strawberry plants, there are a few key things to keep in mind. Follow these tips to ensure that your balcony garden strawberries thrive.
Choosing the Right Variety
When selecting the type of strawberry to grow, consider whether you want to grow them as an annual or perennial. There are three types of strawberry varieties: June bearer or summer fruiting, which bear fruits once in a year in summer and grow as annuals; everbearing, which produce fruit twice a year in summer and fall; and day neutral, which produce fruit throughout the growing season. Choose the variety that best suits your needs and growing conditions.
Planting Your Strawberry Plants
To plant your strawberry plants, follow these simple steps:
Fill your pot with soil and dig out a small hole for the plant.
Place the plant in the soil and then backfill.
Water the plant thoroughly after planting.
Make sure to space your plants at least 12 inches apart to allow for proper growth and development.
Caring for Your Strawberry Plants
Once your strawberry plants are planted, it’s important to care for them properly. Here are some tips to help your plants thrive:
Water your plants regularly, making sure not to overwater them.
Fertilize your plants with a balanced fertilizer once a month during the growing season.
Mulch around the base of your plants to help retain moisture and protect the fruit from rotting.
Keep an eye out for pests and diseases, and treat them promptly if necessary.
By following these simple tips, you can enjoy a bountiful harvest of delicious strawberries from your balcony garden.
Harvesting and Storing Your Strawberries
When it comes to harvesting your balcony garden strawberries, timing is key. The fruit should be left on the plant until it is fully ripe. Look for a deep red color and a slightly soft texture. If you are unsure whether the fruit is ripe, give it a gentle tug. If it comes off easily, it is ready to be harvested.
To pick the strawberries, grasp the stem just above the berry and gently pull it off the plant. Be careful not to damage the plant or the remaining fruit. If you have a larger harvest, consider using a pair of scissors or pruning shears to cut the stem just above the berry.
Once you have harvested your strawberries, it is important to store them properly to ensure they stay fresh and delicious. Here are a few tips for storing your balcony garden strawberries:
Remove any damaged or moldy berries before storing. These can cause the rest of the fruit to spoil more quickly.
Store the strawberries in a single layer in a shallow container. This will help prevent them from getting crushed and will allow air to circulate around them.
Do not wash the strawberries until you are ready to eat them. Excess moisture can cause them to spoil more quickly.
Store the container of strawberries in the refrigerator. They should last for up to a week.
By following these simple tips, you can enjoy the fruits of your balcony garden labor for days to come.
Frequently Asked Questions
Can strawberries be grown in containers?
Yes, strawberries can be grown in containers. In fact, growing strawberries in containers is a great way to enjoy fresh, juicy strawberries even if you don’t have a garden. Make sure to choose a container that is at least 5 inches in diameter and has drainage holes at the bottom to prevent waterlogging.
What are some tips for growing strawberries in pots?
To grow healthy strawberries in pots, use a rich and loamy growing medium and add compost, manure, rotted sawdust, and organic matter to increase soil acidity and fertility. Water your plants regularly and keep the soil moist but not soggy. Provide your plants with at least 6 hours of full sun a day and fertilize them every 2-3 weeks with a balanced fertilizer.
What are the best varieties of strawberries for balcony gardens?
Some of the best varieties of strawberries for balcony gardens include Alpine, Everbearing, and Day-neutral. These varieties are compact, produce a lot of fruit, and are well-suited for growing in containers.
How often should I water my balcony garden strawberries?
Strawberries need to be watered regularly, especially during hot and dry weather. Water your plants deeply once a week, and increase the frequency during periods of drought or high temperatures. Make sure the soil is moist but not soggy, as overwatering can lead to root rot.
What are some common pests and diseases that affect balcony garden strawberries?
Some common pests and diseases that affect balcony garden strawberries include spider mites, aphids, slugs, and powdery mildew. To prevent these problems, make sure to keep your plants healthy and well-fed, and remove any damaged or diseased leaves or fruit immediately.
Do balcony garden strawberries need full sun or partial shade?
Balcony garden strawberries need at least 6 hours of full sun a day to thrive and produce fruit. However, they can also tolerate some shade, especially during the hottest hours of the day. If you live in a hot and sunny area, consider providing your plants with some afternoon shade to prevent them from getting sunburned. Check out this article by Orange Cable Railing called “Can You Grow Strawberries on a Balcony”. (source: orangecountycablerailing.com) As a cable railing installer, they’ve seen a few decks!
When it comes to creating a beautiful balcony garden, one of the most important factors to consider is the color palette. Choosing the right colors can make all the difference in creating a harmonious and visually appealing space. But with so many options available, it can be overwhelming to know where to start. In this article, you will learn everything you need to know about creating a balcony garden color palette that will transform your outdoor space.
Understanding color palettes is the first step in creating a beautiful balcony garden. A color palette is simply a collection of colors that work well together. When choosing a color palette for your balcony garden, it’s important to consider factors such as the size and shape of your space, the amount of sunlight it receives, and the overall mood you want to create. With the right color palette, you can create a space that feels cozy, relaxing, or energizing, depending on your preferences.
Choosing the right colors for your balcony garden can be a fun and creative process. Whether you prefer bold, bright hues or soft, muted tones, there are endless possibilities to explore. By considering factors such as the color of your building, the surrounding landscape, and your personal taste, you can create a color palette that is uniquely your own. With practical tips and expert advice, this article will guide you through the process of creating a balcony garden color palette that will bring your outdoor space to life.
Key Takeaways
Understanding color palettes is key to creating a beautiful balcony garden.
Choosing the right colors for your space depends on factors such as size, shape, and sunlight.
With the right color palette and practical tips, you can transform your balcony garden into a harmonious and visually appealing space.
Understanding Color Palettes
When it comes to creating a beautiful balcony garden color palette, understanding color palettes is essential. A color palette is a range of colors used in a specific design or artwork. It is a combination of colors that work well together and create a harmonious and visually pleasing effect.
Primary Colors
The primary colors are red, blue, and yellow. These colors cannot be created by mixing other colors. They are the building blocks of all other colors. When used in a balcony garden color palette, primary colors can create a bold and vibrant effect.
Secondary Colors
The secondary colors are green, orange, and purple. These colors are created by mixing two primary colors together. For example, blue and yellow create green, red and yellow create orange, and blue and red create purple. Secondary colors can add depth and interest to your balcony garden color palette.
Tertiary Colors
Tertiary colors are created by mixing one primary color with one secondary color. For example, blue-green, red-orange, and yellow-purple are all tertiary colors. Tertiary colors can add nuance and complexity to your balcony garden color palette.
Color Harmonies
Color harmonies are combinations of colors that work well together. There are several types of color harmonies, including complementary, analogous, and monochromatic.
Complementary colors are opposite each other on the color wheel, such as red and green or blue and orange. They create a bold and vibrant effect.
Analogous colors are next to each other on the color wheel, such as blue and green or red and orange. They create a harmonious and calming effect.
Monochromatic colors are different shades and tints of the same color. They create a sophisticated and elegant effect.
Understanding color palettes is essential to creating a beautiful and harmonious balcony garden color palette. By using primary, secondary, and tertiary colors, as well as color harmonies, you can create a visually pleasing and relaxing outdoor space.
Choosing the Right Colors for Your Balcony Garden
When it comes to creating a beautiful balcony garden, choosing the right color palette is essential. The right color scheme can create a relaxing and inviting atmosphere while adding a touch of vibrancy to your space. In this section, we’ll discuss the three main color palettes you can use to create a stunning balcony garden.
Warm Colors
Warm colors like red, orange, and yellow can add a sense of energy and excitement to your balcony garden. These colors are perfect for creating a lively atmosphere and can be used to draw attention to specific areas or plants. For example, you can use warm-colored flowers like marigolds or zinnias to create a bold and eye-catching display.
Cool Colors
Cool colors like blue, green, and purple can create a calming and relaxing atmosphere in your balcony garden. These colors are perfect for creating a peaceful retreat where you can unwind and relax after a long day. You can use cool-colored flowers like lavender or hydrangeas to create a soothing and serene display.
Neutral Colors
Neutral colors like white, beige, and gray can add a touch of elegance and sophistication to your balcony garden. These colors are perfect for creating a timeless and classic look that will never go out of style. You can use neutral-colored flowers like roses or lilies to create a sophisticated and elegant display.
When choosing your balcony garden color palette, it’s important to consider the colors of your surrounding environment. For example, if you have a lot of greenery in your area, you may want to choose a color palette that complements the natural surroundings. Additionally, you should consider the size of your balcony garden. If you have a small space, it’s best to stick to a simple color palette with just a few colors. On the other hand, if you have a larger space, you can experiment with more colors and create a more complex color scheme.
In conclusion, choosing the right balcony garden color palette can make a big difference in the overall look and feel of your space. By following these tips and considering your surroundings and space, you can create a stunning and inviting balcony garden that you can enjoy all year round.
Creating a Harmonious Balcony Garden Color Palette
When it comes to creating a beautiful balcony garden, choosing the right color palette can make all the difference. A well-planned color scheme can transform your balcony into a stunning oasis that is both relaxing and inviting. In this section, we will explore the basics of color theory and how to use it to create a harmonious balcony garden color palette.
Color Wheel Basics
Before we dive into creating a balcony garden color palette, it’s important to understand the basics of color theory. The color wheel is a tool that can help you choose colors that work well together. It is made up of three primary colors (red, blue, and yellow), three secondary colors (green, orange, and purple), and six tertiary colors (yellow-green, yellow-orange, red-orange, red-purple, blue-purple, and blue-green).
When choosing colors for your balcony garden color palette, you can use the color wheel to guide you. You can choose colors that are next to each other on the wheel for a monochromatic scheme, or you can choose colors that are opposite each other for a complementary scheme. You can also choose colors that are three spaces apart for a triadic scheme.
Color Combinations
Now that you understand the basics of the color wheel, it’s time to start choosing colors for your balcony garden color palette. Here are a few color combinations to consider:
Monochromatic: Choose one color and use different shades and tints of that color. For example, you could choose different shades of green for a calming and relaxing balcony garden.
Complementary: Choose colors that are opposite each other on the color wheel. For example, you could choose purple and yellow for a bold and vibrant balcony garden.
Analogous: Choose colors that are next to each other on the color wheel. For example, you could choose blue, green, and yellow for a soothing and natural balcony garden.
Triadic: Choose three colors that are equally spaced on the color wheel. For example, you could choose red, yellow, and blue for a bright and playful balcony garden.
By choosing a color scheme that works well with your balcony’s surroundings and your personal style, you can create a harmonious balcony garden color palette that will bring joy and relaxation to your outdoor space.
Factors Influencing Color Choices
When designing your balcony garden color palette, there are several factors that you need to consider. Two of the most important factors are lighting conditions and seasonal changes.
Lighting Conditions
Lighting conditions play a crucial role in determining the colors that will work best in your balcony garden. Different plants have different lighting requirements, and you need to choose colors that will complement the lighting conditions of your balcony.
If your balcony receives a lot of sunlight, then you can choose bright colors like yellow, orange, and red. These colors will stand out in the bright sunlight and create a vibrant and energetic atmosphere. On the other hand, if your balcony receives less sunlight, then you should choose cooler colors like blue, green, and violet. These colors will look more subdued in low light conditions and create a calming and peaceful atmosphere.
Seasonal Changes
Seasonal changes also play a role in determining the colors that will work best in your balcony garden. Different colors are associated with different seasons, and you can use this to your advantage when designing your balcony garden color palette.
In spring, you can choose bright and cheerful colors like pink, yellow, and lavender. These colors will complement the fresh and new growth of the season. In summer, you can choose bold and vibrant colors like red, orange, and purple. These colors will complement the warmth and energy of the season. In fall, you can choose warm and earthy colors like brown, orange, and red. These colors will complement the changing colors of the leaves. In winter, you can choose cool and icy colors like blue, white, and silver. These colors will complement the frosty and snowy atmosphere of the season.
By considering these factors, you can create a balcony garden color palette that is both beautiful and functional. Remember to choose colors that complement your lighting conditions and the seasonal changes of your balcony garden.
Practical Tips for Implementing Your Balcony Garden Color Palette
When it comes to creating a beautiful balcony garden color palette, there are a few practical tips you can follow to ensure success. Here are some things to keep in mind:
Start Small
If you’re new to gardening or just starting out with a new balcony garden color palette, it’s a good idea to start small. Focus on just a few colors or types of plants at first, and gradually expand your palette as you gain experience and confidence. This will help you avoid feeling overwhelmed and ensure that your balcony garden looks cohesive and well-planned.
Consider Your View
When choosing colors for your balcony garden, it’s important to consider the view from your balcony. If your balcony overlooks a busy street or a concrete jungle, you may want to choose bright, bold colors that will stand out and add some life to the space. On the other hand, if you have a beautiful view of nature or a quiet residential area, you may want to choose more muted, natural colors that will complement the view and create a peaceful atmosphere.
Think About Maintenance
Finally, when choosing plants for your balcony garden color palette, it’s important to think about maintenance. Different plants require different levels of care, so make sure you choose plants that you can realistically care for. If you’re short on time or don’t have a green thumb, choose low-maintenance plants like succulents or herbs. If you’re up for a challenge, choose more high-maintenance plants like orchids or roses.
By following these practical tips, you can create a beautiful balcony garden color palette that will enhance the look and feel of your outdoor space. Remember to start small, consider your view, and think about maintenance, and you’ll be well on your way to a stunning balcony garden.
Conclusion
In conclusion, creating a balcony garden color palette is an exciting and creative process that allows you to express your personality and style. By following the tips and ideas presented in this article, you can create a beautiful and harmonious outdoor space that reflects your taste and preferences.
Remember to choose colors that complement each other and create a cohesive look. You can use color theory to guide your choices, or simply follow your intuition and experiment with different combinations. Don’t be afraid to mix and match, and try new things until you find the perfect balance.
When selecting plants, consider not only their color but also their texture, shape, and size. A mix of different foliage types can add interest and depth to your balcony garden color palette. You can also use accessories such as pots, cushions, and rugs to add pops of color and tie everything together.
Finally, make sure to take into account the lighting conditions of your balcony. Some colors may appear differently in different types of light, so it’s important to test your choices before committing to them. With a little bit of planning and creativity, you can create a balcony garden color palette that is both beautiful and functional.
Frequently Asked Questions
What are some popular color palettes for balcony gardens?
When it comes to balcony garden color palettes, there are a few popular options to consider. One classic choice is a monochromatic color scheme, where you stick to variations of one color. Another popular option is a complementary color scheme, where you choose colors that are opposite each other on the color wheel. Analogous color schemes, where you choose colors that are next to each other on the color wheel, are also a great choice for balcony gardens.
How can I use a color palette generator to choose colors for my balcony garden?
Using a color palette generator can be a helpful way to choose colors for your balcony garden. Simply input a color you like, and the generator will suggest complementary and analogous colors that work well together. Some popular color palette generators include Canva’s Color Palette Generator and Coolors.
What are some wood patio color ideas that would work well for a balcony garden?
If you have a wood patio for your balcony garden, there are a few color ideas that would work well. For a classic look, consider a monochromatic color scheme that uses variations of brown and beige. You could also opt for a complementary color scheme and choose colors like blue or green to contrast with the warm wood tones.
What are the most popular patio colors for 2023?
While it’s hard to predict the most popular patio colors for 2023, some current trends include earthy tones like terracotta and olive green. Blue and green shades are also popular choices for a calming and serene outdoor space.
What are some unique color combinations for a balcony garden?
If you’re looking for a unique color combination for your balcony garden, consider a triadic color scheme, where you choose three colors that are evenly spaced on the color wheel. For example, you could choose yellow, blue, and red for a bold and bright look.
What are some trendy patio color ideas for 2023?
Some trendy patio color ideas for 2023 include warm and cozy colors like rust and burnt orange. Neutral colors like beige and gray are also popular choices for a timeless and classic look. Don’t be afraid to mix and match colors to create a unique and personalized balcony garden color palette. If you’re looking to create a zen balcony garden, try our article “Find Your Inner Peace With A DIY Zen Balcony Garden” for some inspiration.
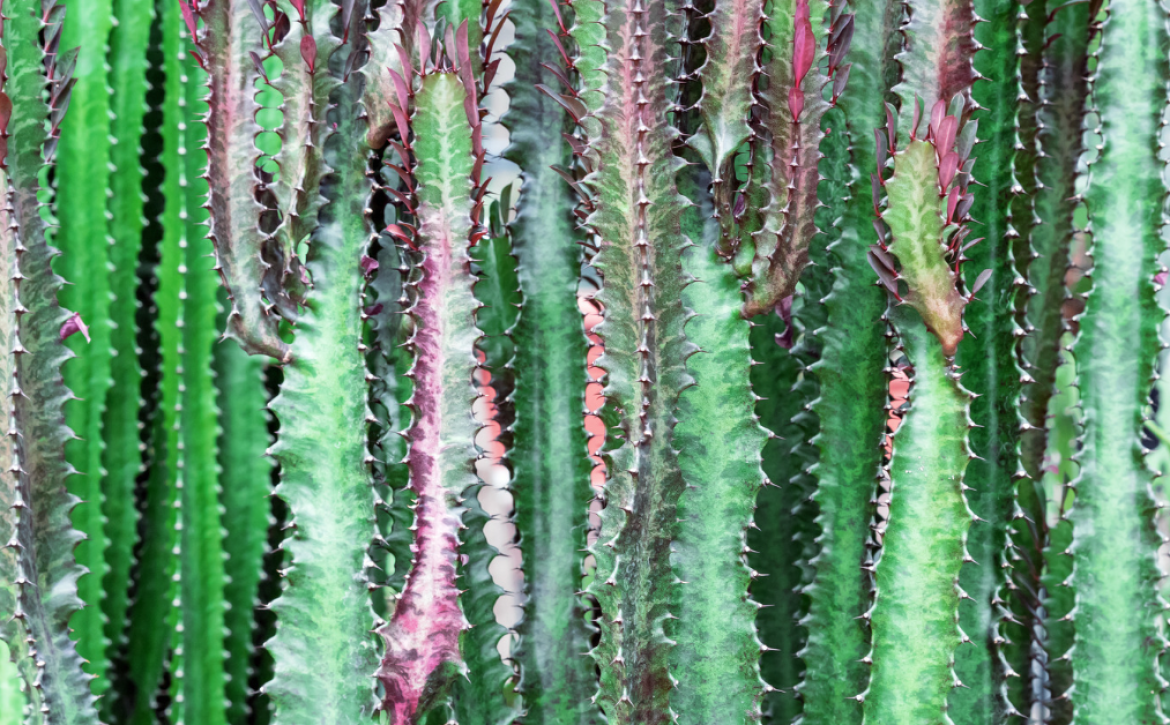
Learn how to grow and care for the African Milk Tree, a beautiful and easy-to-maintain houseplant. Our tips and tricks will help you keep your plant healthy and thriving.
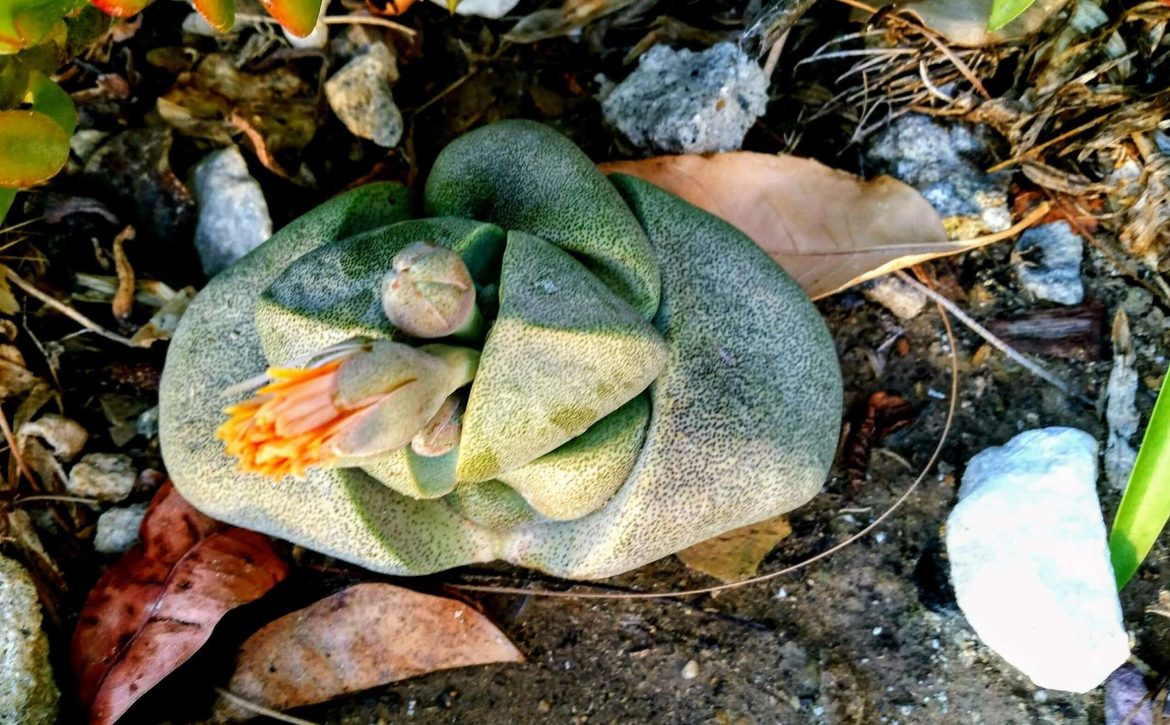
Welcome to our article about splitting a Split Rock plant. If you’re a fan of succulents, you may be familiar with the Split Rock plant, also known as Pleiospilos nelii. This unique plant is named for its distinctive appearance, which resembles a small rock that has been split in half. The Split Rock plant is a popular choice for indoor gardens and is relatively easy to care for. They do like dry, arid, and semi-arid climates best. They are good for regions 9-11 or as indoor plants with plenty of indirect sunlight. Check out the USDA Plant Hardiness Zone Map (source: planthardiness.ars.usda.gov)
Splitting your Split Rock plant involves separating the plant into two or more sections, each of which can grow into a new plant. This process is relatively simple and can be done with just a few tools. However, it’s important to take care when splitting your plant to avoid damaging the roots or causing stress to the plant. With the right technique and a little bit of patience, you can split your Split Rock plant and create a beautiful new addition to your collection.
Splitting Your Split Rock Plant
If your Split Rock plant is outgrowing its current pot or you want to propagate it, splitting the plant can be a great option. Splitting your Split Rock plant involves dividing the plant into two or more sections and replanting them. Here are the steps to follow:
Preparing the Plant
Before you start splitting your Split Rock plant, you need to prepare it. Here are the steps to follow:
Water the plant a few days before splitting it. This will make it easier to remove from the pot and less likely to break during the process.
Choose a pot that is at least 3.5 to 4 inches deep with a hole in the bottom for proper drainage.
Prepare the soil: a) by blending a 25% cactus mix and 75% pumice or perlite. This will provide good drainage for the plant; b) is a mix of 1 part peat moss to 1 part loam to 2 parts coarse sand with small pebbles added for drainage; c) another is a mineral mix that is low in organic matter.
Splitting the Plant
Once you have prepared the plant, it’s time to split it. Here are the steps to follow:
Remove the plant from its pot and gently remove any excess soil from the roots.
Look for natural splits or divisions in the plant. If there are none, create a split by carefully pulling the plant apart at its base.
Use a clean, sharp knife to cut the plant into sections. Each section should have its own roots and at least one set of leaves.
Be careful not to damage the roots or leaves during the process.
Replanting the Divisions
After you have split the plant, it’s time to replant the divisions. Here are the steps to follow:
Fill the new pot with the prepared soil and make a hole in the center.
Place each division in its own hole and gently pack the soil around it.
Water the plant lightly and place it in a bright, sunny spot.
Wait a few days before watering the plant again to allow it to adjust to its new environment.
When Not to Split Your Split Rock Plant
It is generally not recommended to split a split rock plant if it is not actively growing or if it is in poor health. Splitting a plant that is not actively growing or is unhealthy can cause additional stress to the plant and may not result in successful propagation. It is also not recommended to split a split rock plant during the winter months, as this is typically a period of dormancy for the plant.
Additionally, splitting a plant that is too small may not be advisable, as it may not have enough energy reserves to support multiple plants. It is important to assess the health and growth patterns of the plant before attempting to split it. If you are unsure whether your split rock plant is ready to be split, it may be best to consult a plant care expert or horticulturist for guidance.
Conclusion
Splitting your Split Rock plant can be a great way to propagate the plant or keep it from outgrowing its current pot. By following these steps, you can successfully split your plant and enjoy its unique beauty in multiple locations. For more information about the Split Rock Plant, see our Article, “Split Rock Plant: The Unique and Easy-to-Care-For Succulent“. It’s truly one of our favorites!
If you’re looking for a natural and cost-effective way to maintain your balcony garden, using vinegar might be the solution you’re looking for. Vinegar has many uses in gardening, from weed control to pest prevention. Incorporating vinegar into your balcony garden routine can help you keep your plants healthy and thriving. In addition, there are so many amazing ways to use vinegar around the house and home. (source: balconygardenweb.com)
One way to use vinegar in your balcony garden is by making a natural herbicide. Mix vinegar with water and a few drops of dish soap, and apply it to the base of the weeds. The acidity of the vinegar will kill the weeds without harming your plants. Another way to use vinegar is by using it as a natural pest repellent. Spray a mixture of vinegar and water onto your plants to repel pests like aphids and spider mites.
Benefits of Using Vinegar in Your Balcony Garden
Using vinegar in your balcony garden is not only natural and cost-effective, but it’s also easy to do. With just a few simple steps, you can incorporate vinegar into your gardening routine and reap the benefits of a healthy and thriving garden. Try using vinegar in your balcony garden today and see the difference it can make.
Controlling Weeds
Weeds can be a nuisance in any garden, and balcony gardens are no exception. Fortunately, vinegar can be an effective and natural way to control weeds without harming your plants. Vinegar contains acetic acid, which can dry out and kill weeds. To use vinegar as a weed killer, mix one part vinegar with one part water and spray the mixture directly on the weeds. Be careful not to spray the mixture on your plants, as vinegar can also harm them.
Altering Soil pH
The pH level of your soil can affect the growth and health of your plants. If your soil is too alkaline, vinegar can help lower the pH level and make it more acidic. This can be especially beneficial for plants that prefer acidic soil, such as blueberries and azaleas. To alter the pH level of your soil, mix one cup of vinegar with one gallon of water and pour the mixture over the soil.
Repelling Pests
Pests such as ants, slugs, and snails can damage your plants and ruin your garden. Using vinegar can help repel these pests and keep them away from your plants. To use vinegar as a pest repellent, mix equal parts vinegar and water and spray the mixture around your plants. The strong smell of vinegar can deter pests and keep them from coming back.
In conclusion, using vinegar in your balcony garden can be a natural and effective way to maintain your plants and keep your garden healthy. Whether you are looking to control weeds, alter soil pH, or repel pests, vinegar can be a versatile and affordable solution. Just be sure to use it carefully and in moderation, as too much vinegar can harm your plants.
How to Use Vinegar in Your Balcony Garden
Using vinegar in your balcony garden can be a natural and effective way to control weeds, pests, and fungus. However, it is important to use it correctly to avoid damaging your plants. In this section, we will discuss how to use vinegar in your balcony garden, including preparing the vinegar solution, applying the vinegar solution, and avoiding overuse.
Preparing the Vinegar Solution
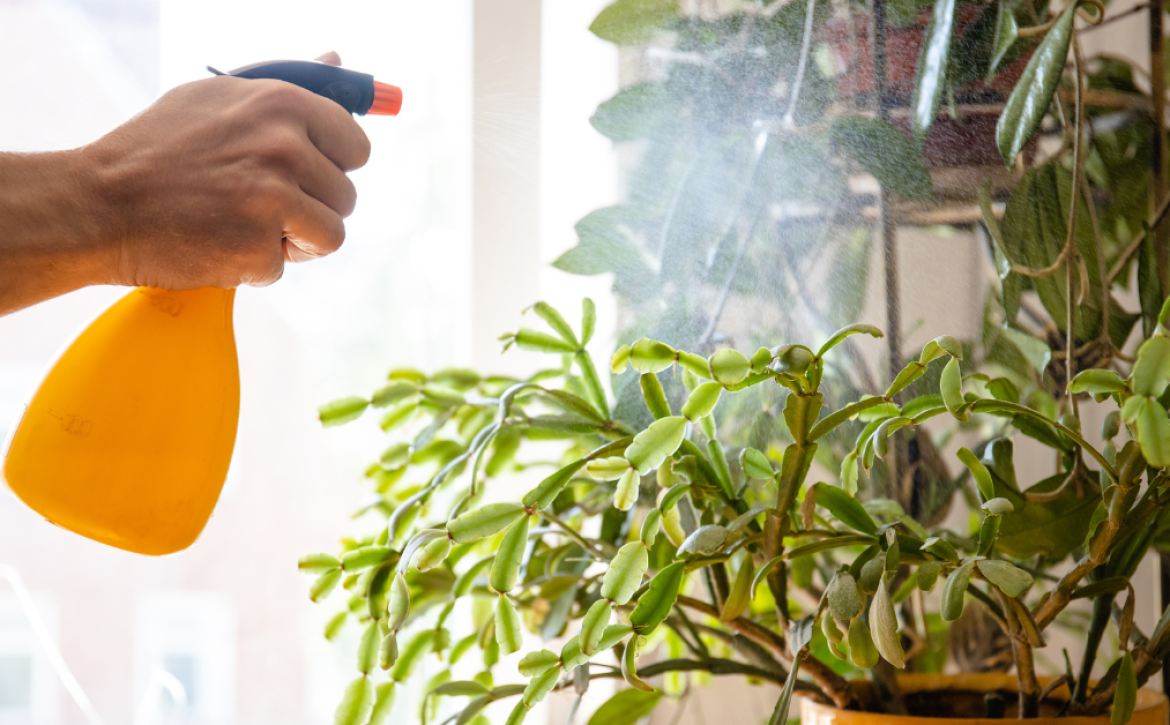
To prepare the vinegar solution, you will need white vinegar, water, and a spray bottle. Mix one part vinegar with three parts water in the spray bottle. Shake the bottle well to ensure that the solution is thoroughly mixed.
Applying the Vinegar Solution
When applying the vinegar solution, be careful not to spray it directly on your plants, as it can damage them. Instead, spray it on the soil or on the weeds, pests, or fungus that you want to control. It is best to apply the solution on a sunny day, as the sun will help to dry out the solution faster.
Avoiding Overuse
While vinegar can be an effective natural solution, it is important to avoid overusing it. Using too much vinegar can damage your plants and soil. It is recommended to use vinegar only on weeds, pests, and fungus, and to avoid using it on healthy plants. Additionally, it is best to use vinegar sparingly, and to monitor your plants for any signs of damage.
In summary, using vinegar in your balcony garden can be a natural and effective way to control weeds, pests, and fungus. To use it correctly, prepare the vinegar solution by mixing one part vinegar with three parts water, apply it carefully to avoid damaging your plants, and avoid overusing it to prevent damage to your plants and soil.
Types of Vinegar to Use in Your Balcony Garden
White Vinegar
White vinegar is a popular choice for gardeners because it’s inexpensive and readily available. It can be used to kill weeds, deter pests, and even clean your gardening tools. To use white vinegar in your balcony garden, simply mix one part vinegar with two parts water and spray it on your plants. Be careful not to use too much vinegar, as it can damage your plants if used in excess.
Apple Cider Vinegar
Apple cider vinegar is another great option for your balcony garden. It’s a natural fungicide and can help prevent fungal diseases from affecting your plants. To use apple cider vinegar in your garden, mix one tablespoon of vinegar with one gallon of water and spray it on your plants. You can also add a few drops of dish soap to help the mixture stick to your plants.
Balsamic Vinegar
Balsamic vinegar is a flavorful addition to your balcony garden. It can be used as a natural fertilizer and can help improve the soil quality in your garden. To use balsamic vinegar in your garden, mix one tablespoon of vinegar with one gallon of water and use it to water your plants. You can also use balsamic vinegar as a natural insect repellent by mixing it with water and spraying it on your plants.
Overall, using vinegar in your balcony garden can be a great way to keep your plants healthy and thriving. By using the right type of vinegar and following the proper instructions, you can enjoy a beautiful and productive garden without breaking the bank.
Precautions When Using Vinegar in Your Balcony Garden
When using vinegar in your balcony garden, it is important to take some precautions to ensure your safety and the safety of your plants, children, and pets. Here are some tips to help you use vinegar safely:
Avoiding Contact with Skin and Eyes
When handling vinegar, it is important to avoid contact with your skin and eyes. Vinegar is acidic and can cause irritation or burns. Always wear gloves and protective eyewear when handling vinegar. If vinegar comes into contact with your skin or eyes, rinse immediately with plenty of water.
Using Vinegar Safely Around Children and Pets
Vinegar is generally safe to use around children and pets, but it is important to take some precautions. Keep vinegar out of reach of children and pets. If you are using vinegar as a herbicide, make sure to keep your children and pets away from the treated area until the vinegar has dried.
Avoiding Damage to Plants
While vinegar can be an effective herbicide, it can also damage your plants if used improperly. Avoid spraying vinegar directly on your plants, as it can burn the leaves and stems. Instead, apply vinegar to the base of the weeds or use a sponge or brush to apply vinegar directly to the leaves of the weeds.
When using vinegar in your balcony garden, it is also important to dilute it properly. Using undiluted vinegar can damage your plants and soil. Mix one part vinegar with three parts water to create a safe and effective herbicide.
Using vinegar in your balcony garden can be a safe and effective way to control weeds and pests, but as stated, it is important to take some precautions to ensure your safety and the safety of your plants, children, and pets. Always wear gloves and protective eyewear, keep vinegar out of reach of children and pets, and avoid spraying vinegar directly on your plants. Dilute vinegar properly to avoid damage to your plants and soil. And for information about choosing plants for your balcony garden, please read our article, “Best Eco-Friendly Garden Plants for Your Balcony“.




 Lisa Woods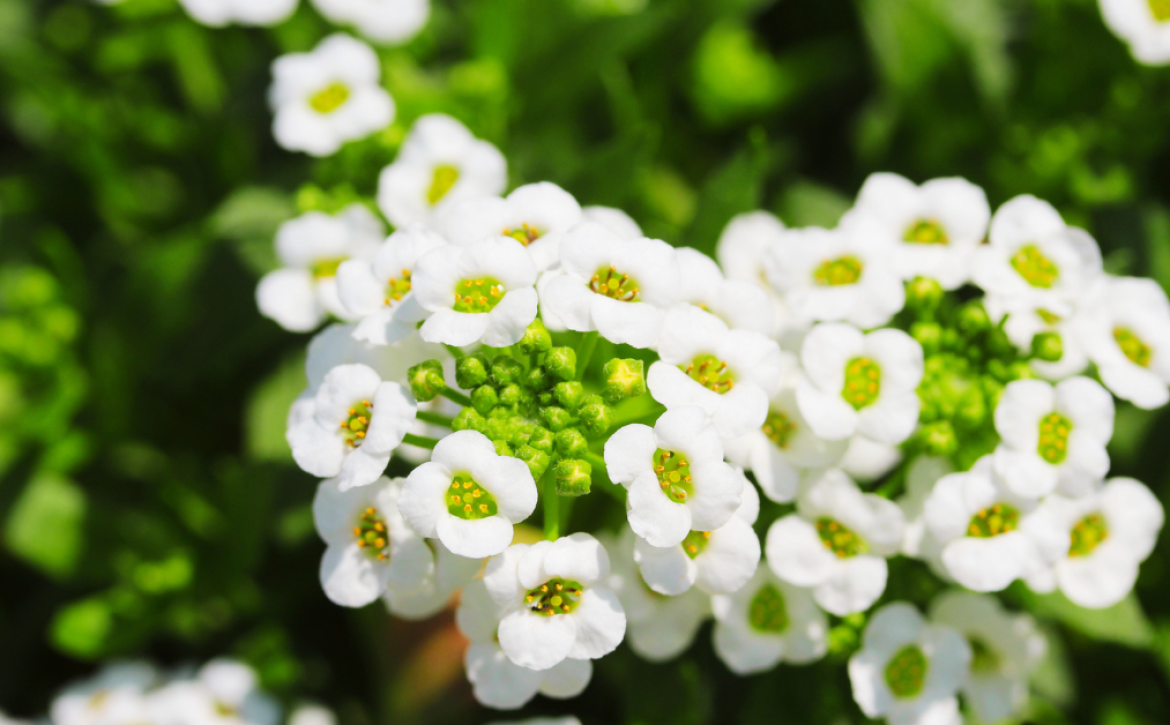

 welcome@balconygardenparadise.com