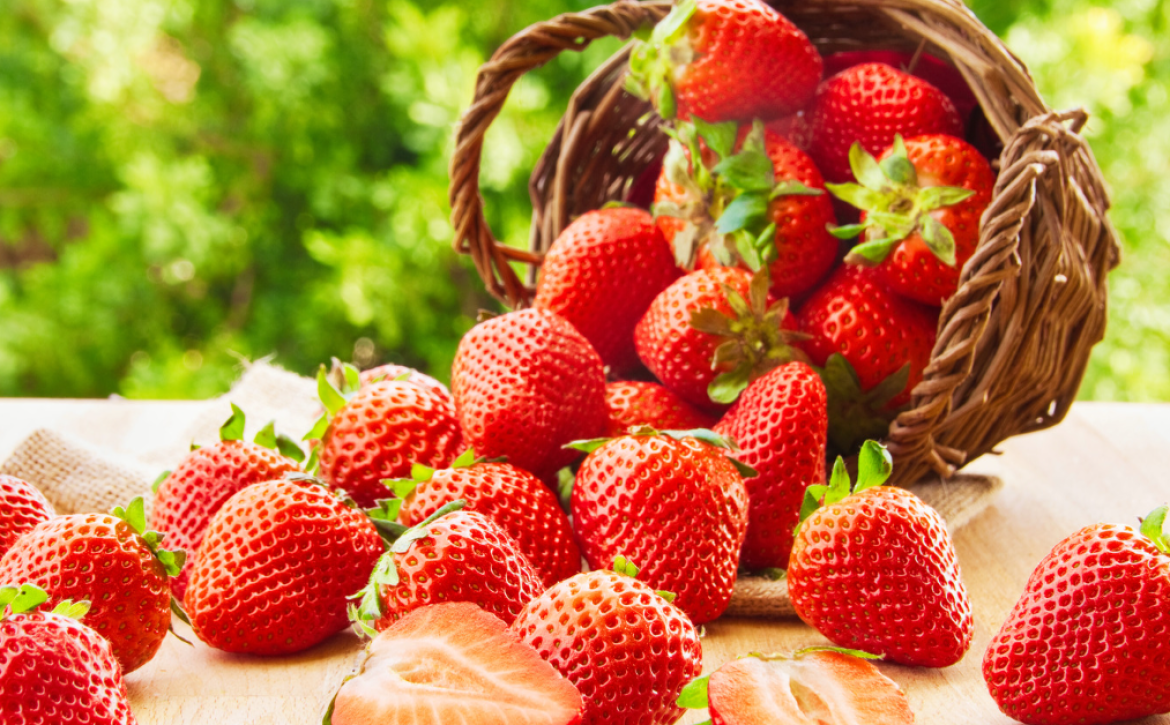
Grow Juicy Balcony Garden Strawberries: Great for an Urban Garden

If you’re looking for a fun and rewarding way to grow your own fresh produce, consider starting a balcony garden with strawberries. Not only do strawberries produce delicious fruit, but they are also well-suited to growing in small spaces and require very little maintenance. With the right techniques and a little bit of care, you can enjoy juicy, sweet strawberries all season long.

There are many benefits to growing strawberries in a balcony garden. For one, they are easy to care for and require minimal space. Additionally, they are rich in vitamin C and antioxidants, making them a healthy addition to your diet. With a few simple steps, you can start growing your own strawberries and enjoy the taste of fresh, homegrown fruit all summer long.

Key Takeaways

  • Balcony gardens are a great way to grow your own fresh produce, including strawberries.
  • Choosing the right variety of strawberries and preparing your balcony garden properly are key to a successful harvest.
  • With the right care and maintenance, you can enjoy juicy, sweet strawberries from your balcony garden all season long.

Benefits of Balcony Garden Strawberries
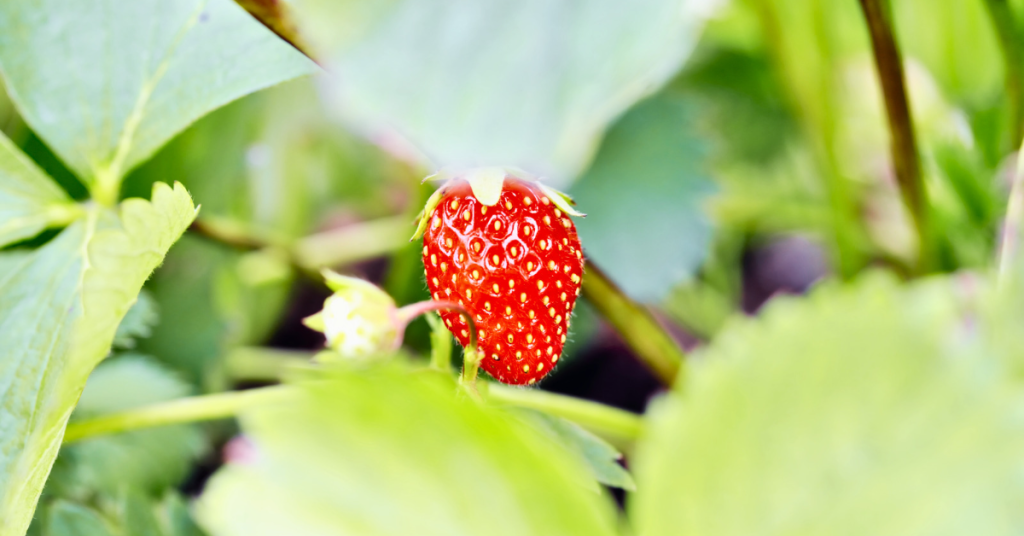
There are several advantages to balcony garden strawberries.  They are fresh and organic, they save you money, and they're beautiful!

Growing strawberries in a balcony garden has numerous benefits. Here are some of the benefits of having a balcony garden:

Fresh, Organic Produce

One of the biggest benefits of having a balcony garden is the availability of fresh, organic produce. By growing your own strawberries, you can ensure that the fruit is free from harmful chemicals and pesticides. Plus, you can pick the strawberries at the peak of ripeness, ensuring maximum flavor and nutrition.

Saves Money

Growing your own strawberries in a balcony garden can also save you money in the long run. By eliminating the need to purchase strawberries from the grocery store, you can save money on your grocery bill. Plus, you can grow other fruits and vegetables in your balcony garden, further reducing your grocery expenses.

Aesthetic Appeal

A balcony garden can also add aesthetic appeal to your home. With a variety of plants and flowers, you can create a beautiful and inviting space on your balcony. Plus, the sight and smell of fresh strawberries can be a delightful addition to your balcony garden.

Stress Relief

Gardening has been shown to have stress-relieving benefits. By tending to your balcony garden, you can reduce stress and anxiety, improve your mood, and promote overall well-being.

In conclusion, a balcony garden can provide numerous benefits, including fresh, organic produce, cost savings, aesthetic appeal, and stress relief. By growing your own strawberries in a balcony garden, you can enjoy all of these benefits and more.

Choosing the Right Strawberry Varieties

When it comes to growing strawberries on your balcony, choosing the right variety is essential. With so many different types of strawberries available, it can be challenging to know which ones will work best for your balcony garden.

Here are some factors to consider when selecting strawberry varieties for your balcony garden:

1. Space and Pot Size

The first thing to consider is the space you have available on your balcony and the size of the pots you plan to use. Some strawberry varieties, such as Alpine strawberries, are compact and can be grown in small pots. Other varieties, such as June-bearing strawberries, require more space and larger pots to grow successfully.

2. Climate

Another important factor to consider is your climate. Some strawberry varieties, such as Everbearing strawberries, are better suited for cooler climates, while others, such as Day-neutral strawberries, can thrive in warmer temperatures.

3. Yield and Fruit Size

Consider the yield and size of the fruit when selecting strawberry varieties. June-bearing strawberries typically produce larger fruit, while Everbearing and Day-neutral strawberries produce smaller fruit but over a more extended period.

4. Taste and Flavor

Finally, consider the taste and flavor of the strawberries you plan to grow. Some varieties, such as Chandler strawberries, are known for their sweet flavor, while others, such as Seascape strawberries, have a more tangy taste.

Overall, the best strawberry varieties for your balcony garden will depend on your specific needs and preferences. Take the time to research different varieties and choose the ones that are best suited for your balcony garden. With the right variety, you can enjoy fresh, delicious strawberries right from your balcony all season long.

Preparing Your Balcony Garden for Strawberries
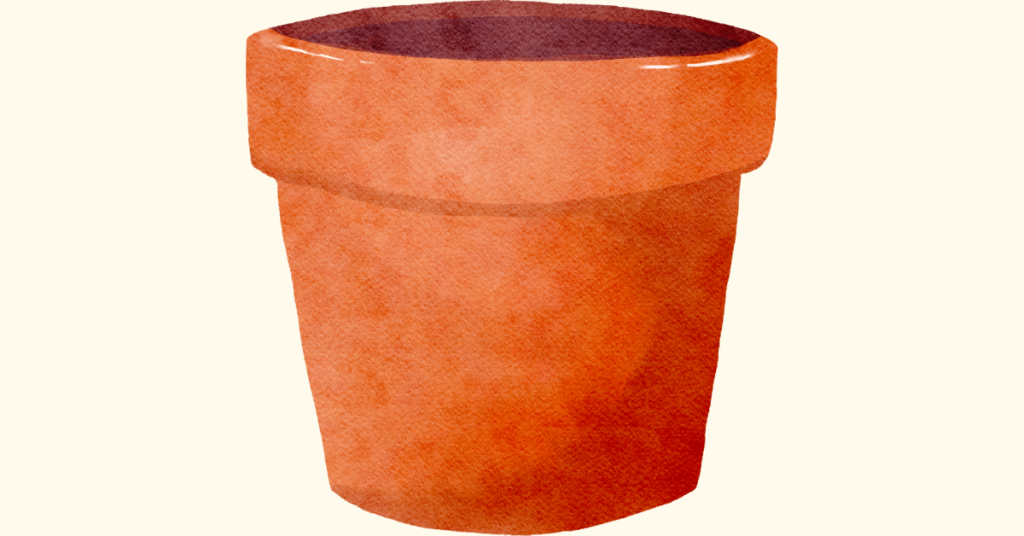
Picking the right container can make all the difference for your balcony garden strawberries.

Growing strawberries on a balcony is a fun and rewarding project that can yield delicious fruit right outside your door. However, before planting your strawberries, it’s important to prepare your balcony garden properly. Here are some tips to help you get started.

Assess Your Balcony’s Sunlight

Strawberries need at least six hours of direct sunlight per day to thrive. Before planting your strawberries, assess your balcony’s sunlight exposure. Observe how much sunlight your balcony receives throughout the day and determine the best location for your strawberry plants. If your balcony doesn’t get enough sunlight, consider using grow lights to supplement the natural light.

Choose the Right Containers

Strawberries can be grown in a variety of containers, including pots, hanging baskets, and window boxes. When choosing containers, make sure they have drainage holes to prevent water from accumulating in the soil. Also, the containers should be large enough to accommodate the roots of the strawberry plants and allow for proper drainage.

Select the Right Soil

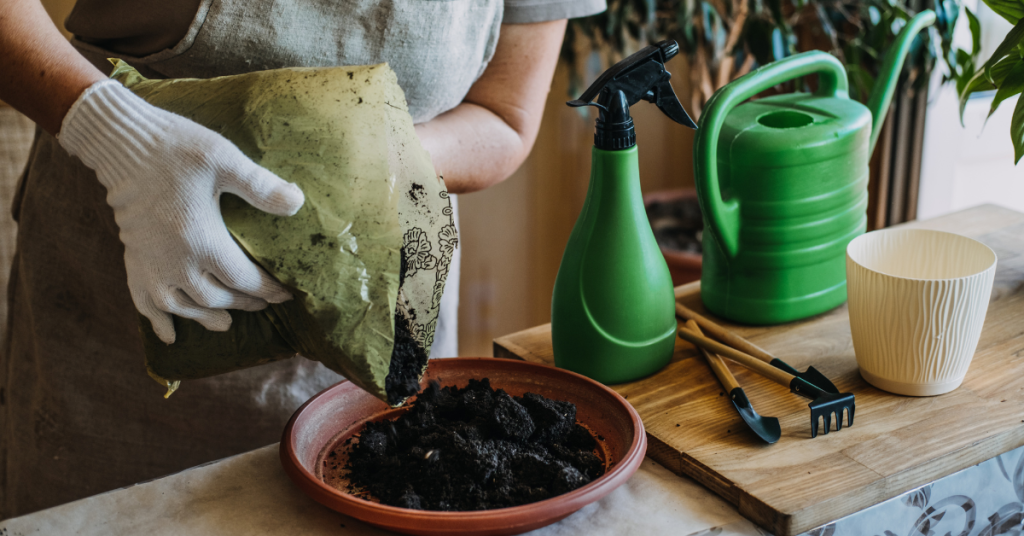
Strawberries prefer well-draining soil that is rich in organic matter. Choose a potting mix that is specifically formulated for container gardening, or make your own by combining equal parts of peat moss, vermiculite, and perlite. Additionally, you can add compost or aged manure to the soil to provide additional nutrients.

Consider Companion Planting

Companion planting is a gardening technique that involves planting different plants together to benefit each other. Consider planting companion plants with your strawberries, such as herbs or flowers, to help repel pests and attract beneficial insects.

By following these tips, you can prepare your balcony garden for strawberries and set yourself up for a successful harvest. With a little bit of planning and care, you can enjoy fresh, juicy strawberries right from your balcony.

Planting and Caring for Your Strawberry Plants

When it comes to planting and caring for your strawberry plants, there are a few key things to keep in mind. Follow these tips to ensure that your balcony garden strawberries thrive.

Choosing the Right Variety

When selecting the type of strawberry to grow, consider whether you want to grow them as an annual or perennial. There are three types of strawberry varieties: June bearer or summer fruiting, which bear fruits once in a year in summer and grow as annuals; everbearing, which produce fruit twice a year in summer and fall; and day neutral, which produce fruit throughout the growing season. Choose the variety that best suits your needs and growing conditions.

Planting Your Strawberry Plants

To plant your strawberry plants, follow these simple steps:

  1. Fill your pot with soil and dig out a small hole for the plant.
  2. Place the plant in the soil and then backfill.
  3. Water the plant thoroughly after planting.

Make sure to space your plants at least 12 inches apart to allow for proper growth and development.

Caring for Your Strawberry Plants

Once your strawberry plants are planted, it’s important to care for them properly. Here are some tips to help your plants thrive:

  • Water your plants regularly, making sure not to overwater them.
  • Fertilize your plants with a balanced fertilizer once a month during the growing season.
  • Mulch around the base of your plants to help retain moisture and protect the fruit from rotting.
  • Keep an eye out for pests and diseases, and treat them promptly if necessary.

By following these simple tips, you can enjoy a bountiful harvest of delicious strawberries from your balcony garden.

Harvesting and Storing Your Strawberries

When it comes to harvesting your balcony garden strawberries, timing is key. The fruit should be left on the plant until it is fully ripe. Look for a deep red color and a slightly soft texture. If you are unsure whether the fruit is ripe, give it a gentle tug. If it comes off easily, it is ready to be harvested.

To pick the strawberries, grasp the stem just above the berry and gently pull it off the plant. Be careful not to damage the plant or the remaining fruit. If you have a larger harvest, consider using a pair of scissors or pruning shears to cut the stem just above the berry.

Once you have harvested your strawberries, it is important to store them properly to ensure they stay fresh and delicious. Here are a few tips for storing your balcony garden strawberries:

  • Remove any damaged or moldy berries before storing. These can cause the rest of the fruit to spoil more quickly.
  • Store the strawberries in a single layer in a shallow container. This will help prevent them from getting crushed and will allow air to circulate around them.
  • Do not wash the strawberries until you are ready to eat them. Excess moisture can cause them to spoil more quickly.
  • Store the container of strawberries in the refrigerator. They should last for up to a week.

By following these simple tips, you can enjoy the fruits of your balcony garden labor for days to come.

Frequently Asked Questions

Can strawberries be grown in containers?

Yes, strawberries can be grown in containers. In fact, growing strawberries in containers is a great way to enjoy fresh, juicy strawberries even if you don’t have a garden. Make sure to choose a container that is at least 5 inches in diameter and has drainage holes at the bottom to prevent waterlogging.

What are some tips for growing strawberries in pots?

To grow healthy strawberries in pots, use a rich and loamy growing medium and add compost, manure, rotted sawdust, and organic matter to increase soil acidity and fertility. Water your plants regularly and keep the soil moist but not soggy. Provide your plants with at least 6 hours of full sun a day and fertilize them every 2-3 weeks with a balanced fertilizer.

What are the best varieties of strawberries for balcony gardens?

Some of the best varieties of strawberries for balcony gardens include Alpine, Everbearing, and Day-neutral. These varieties are compact, produce a lot of fruit, and are well-suited for growing in containers.

How often should I water my balcony garden strawberries?

Strawberries need to be watered regularly, especially during hot and dry weather. Water your plants deeply once a week, and increase the frequency during periods of drought or high temperatures. Make sure the soil is moist but not soggy, as overwatering can lead to root rot.

What are some common pests and diseases that affect balcony garden strawberries?

Some common pests and diseases that affect balcony garden strawberries include spider mites, aphids, slugs, and powdery mildew. To prevent these problems, make sure to keep your plants healthy and well-fed, and remove any damaged or diseased leaves or fruit immediately.

Do balcony garden strawberries need full sun or partial shade?

Balcony garden strawberries need at least 6 hours of full sun a day to thrive and produce fruit. However, they can also tolerate some shade, especially during the hottest hours of the day. If you live in a hot and sunny area, consider providing your plants with some afternoon shade to prevent them from getting sunburned. Check out this article by Orange Cable Railing called “Can You Grow Strawberries on a Balcony”. (source: orangecountycablerailing.com) As a cable railing installer, they’ve seen a few decks!

Read related posts:

Your Balcony Garden: Mastering Natural Light for Stunning Plant Imagery

Create a dynamic and beautiful balcony garden by using natural light to your advantage. Discover which plants thrive in different light conditions.

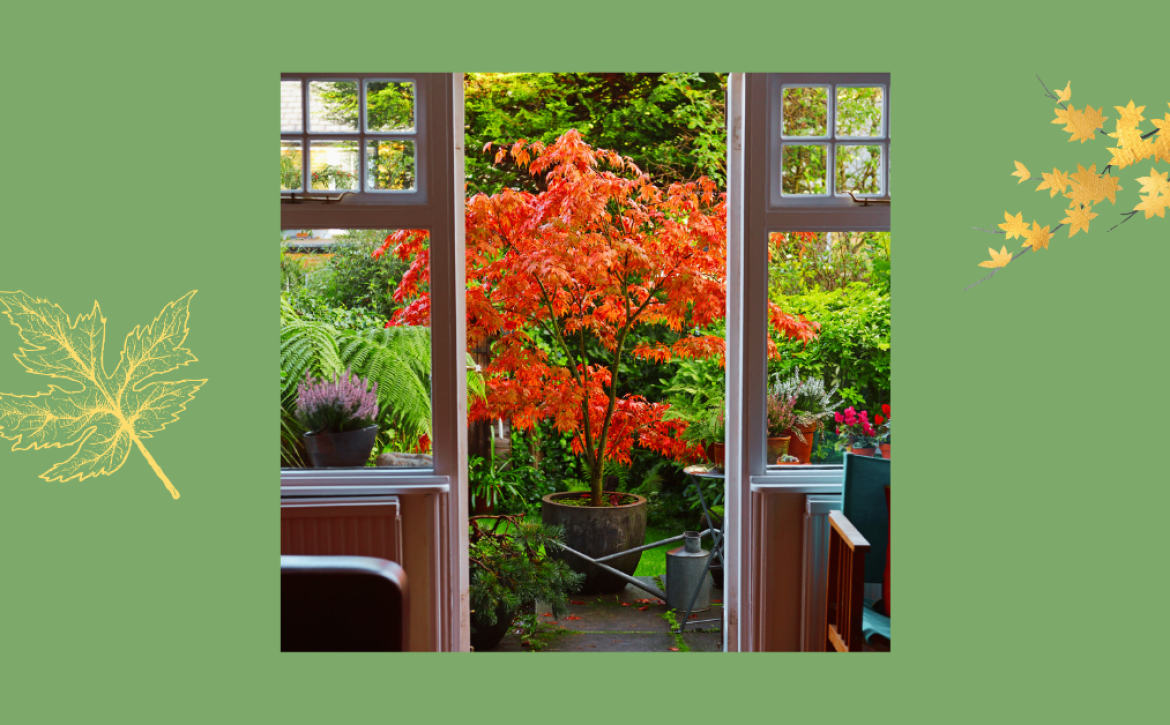
Creating a Stunning Balcony Garden with Japanese Maples

Learn how to create a stunning balcony garden with Japanese maples. Discover the best tips and tricks for growing these beautiful trees in containers.

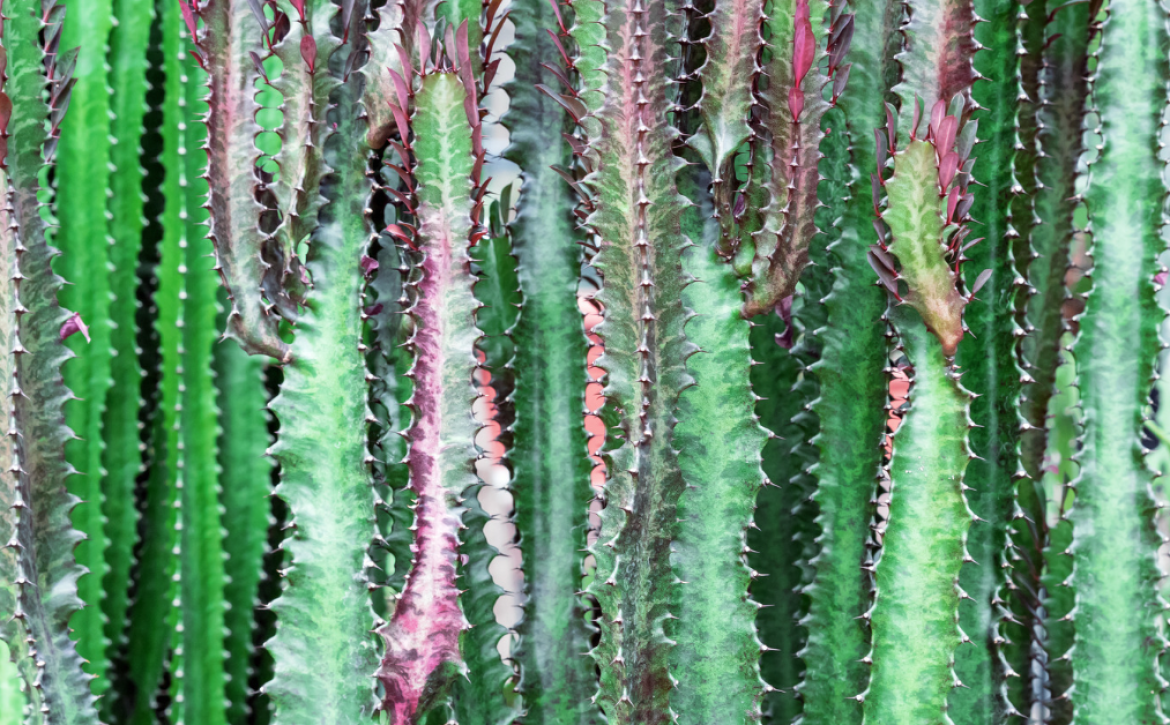
African Milk Tree is an Amazing Balcony Garden Plant: Growing and Caring for Your Succulent

Learn how to grow and care for the African Milk Tree, a beautiful and easy-to-maintain houseplant. Our tips and tricks will help you keep your plant healthy and thriving.

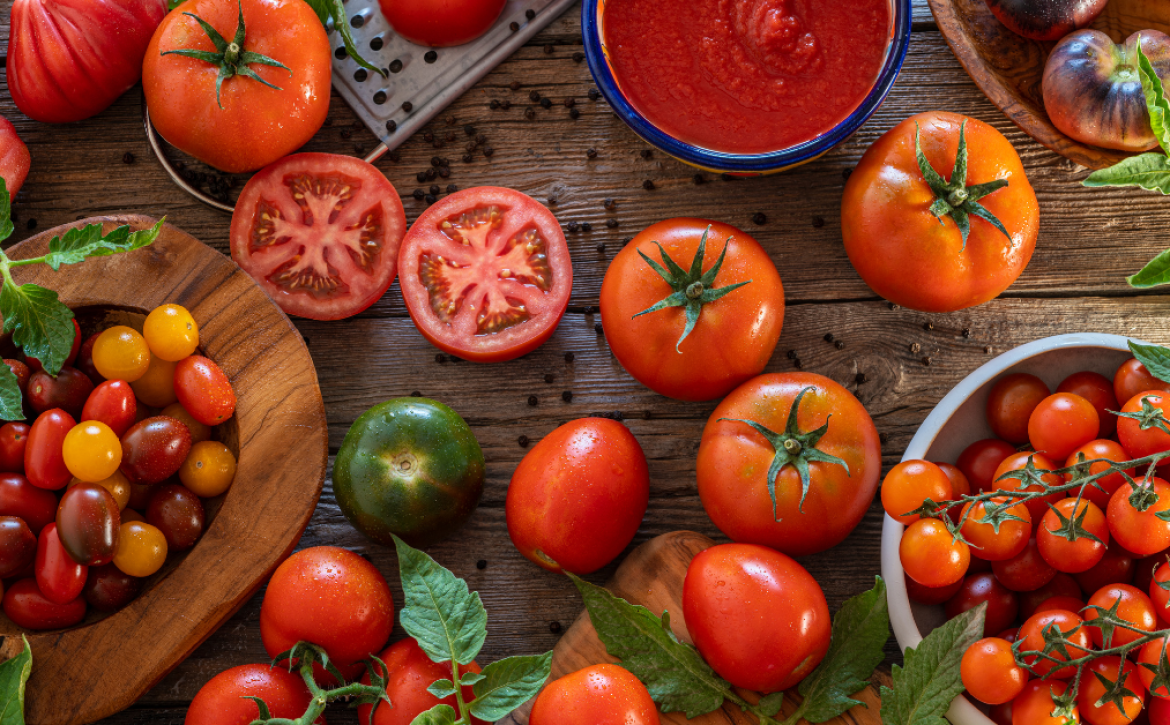
Growing Juicy Tomatoes in Your Balcony: Urban Gardening Made Easy

Growing tomatoes in your balcony garden is a great way to add some greenery and visual interest. Not only do they add a pop of color to your space, but they’re also easy to grow and care for. With the right preparation and care, you can enjoy a bountiful harvest of juicy, ripe tomatoes all summer long. You can even incorporate tomatoes in a green wall: “Types of Vertical Gardens: Creating a Stunning Green Wall“.

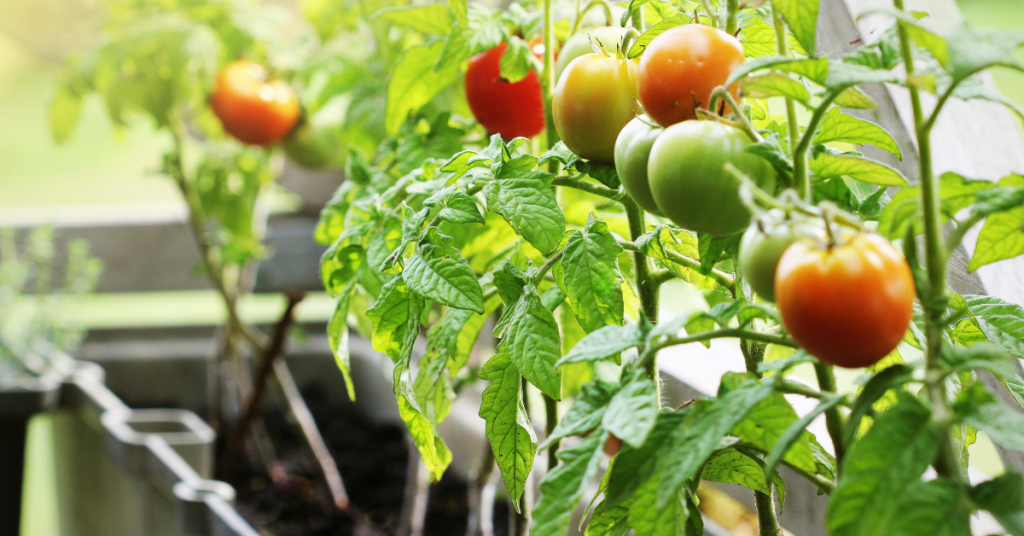
Tomatoes in your balcony garden can be grown vertically using different methods.

One of the biggest benefits of growing tomatoes on your balcony is that you can control the growing environment. You can choose the right type of soil, fertilizer, and watering schedule to ensure your plants thrive. Plus, you don’t need a lot of space to get started – even a small balcony can accommodate a few tomato plants.

To get started, it’s important to choose the right tomato varieties for your balcony garden. You’ll want to select varieties that are well-suited to growing in containers and that produce a high yield. With the right preparation and care, you’ll be able to enjoy delicious, homegrown tomatoes all season long.

Key Takeaways

  • Growing tomatoes on your balcony is a great way to add greenery to your space and enjoy a bountiful harvest of juicy, ripe tomatoes.
  • By controlling the growing environment, you can ensure your tomato plants thrive and produce a high yield.
  • Choosing the right tomato varieties, preparing your balcony garden, and providing proper care are all essential for a successful harvest.

Benefits of Balcony Garden Tomatoes

Growing tomatoes in your balcony garden has many benefits. Here are some reasons why you should consider growing tomatoes in your balcony garden:

  • Fresh and Nutritious Produce: Homegrown tomatoes are fresh and packed with nutrients. They contain vitamins A, C, and K, potassium, and lycopene, which is a powerful antioxidant. When you grow tomatoes in your balcony garden, you can enjoy the benefits of fresh and nutritious produce right at home.
  • Cost-Effective: Growing tomatoes in your balcony garden is cost-effective. You don’t have to spend a lot of money on buying tomatoes from the grocery store. Instead, you can grow them at home and save money on your grocery bill.
  • Easy to Grow: Tomatoes are easy to grow, even in small spaces like balconies. They require minimal maintenance and can be grown in containers. You don’t need a lot of gardening experience to grow tomatoes in your balcony garden.
  • Versatile: Tomatoes are versatile and can be used in a variety of dishes. You can use them in salads, sandwiches, pasta dishes, and more. When you have a steady supply of fresh tomatoes from your balcony garden, you can experiment with different recipes and add fresh flavor to your meals.
  • Sustainable: Growing your own tomatoes is a sustainable practice. It reduces your carbon footprint by eliminating the need for transportation and packaging. It also reduces food waste because you only harvest what you need.

In summary, growing tomatoes in your balcony garden is a cost-effective, sustainable, and nutritious way to enjoy fresh produce at home. With minimal effort and space, you can enjoy the benefits of homegrown tomatoes and add fresh flavor to your meals.

Choosing the Right Tomato Varieties

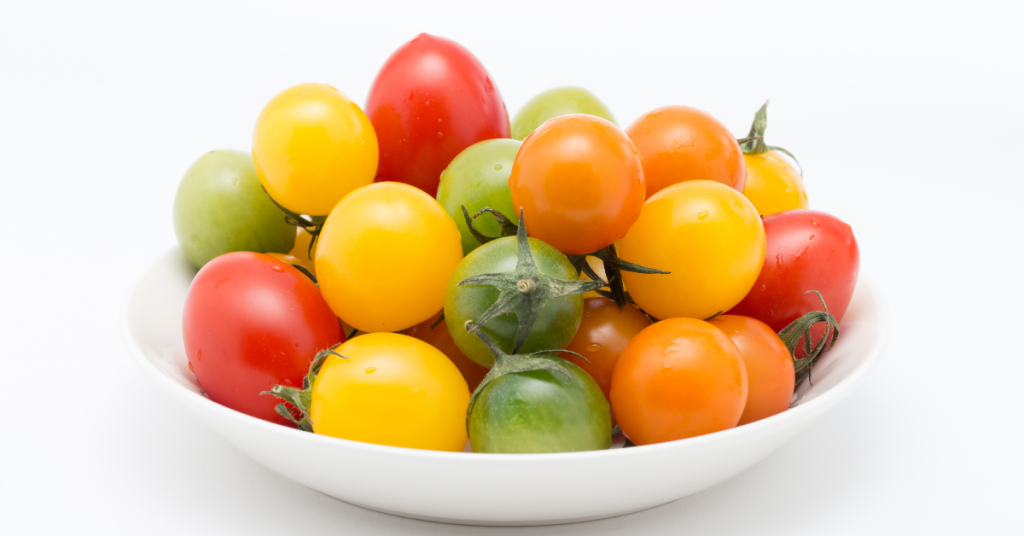
Cherry tomatoes are a great choice of tomatoes in your balcony garden.

When it comes to choosing the right tomato varieties for your balcony garden, there are a few things to consider. The right variety can make all the difference in terms of yield, taste, and ease of care. Here are some factors to keep in mind:

Size

First, consider the size of the tomato plant you want to grow. For balcony gardens, it’s best to choose varieties that are compact and don’t grow too tall. Determinate varieties are a good choice since they have a more bush-like growth habit and produce a concentrated crop over a shorter period. Some popular determinate varieties include Roma, Celebrity, and Bush Early Girl.

Flavor

Next, consider the flavor profile you’re looking for. Do you prefer a sweet, juicy tomato or a more acidic one? Some popular sweet varieties include Sungold, Sweet 100, and Cherry Gold. For a more acidic flavor, try San Marzano, Amish Paste, or Brandywine.

Disease Resistance

Disease resistance is another factor to consider when choosing tomato varieties. Some varieties are more resistant to common tomato diseases like blight and wilt, which can help ensure a healthy crop. Look for varieties labeled as disease-resistant, such as Mountain Merit, Defiant, and Iron Lady.

Container Size

Finally, consider the size of the container you’ll be planting your tomatoes in. Larger varieties will need more space and a larger container to grow in. A general rule of thumb is to choose a container that’s at least 18 inches in diameter and 24 inches deep for larger varieties. Smaller varieties can do well in containers as small as 12 inches in diameter.

By considering these factors, you can choose the right tomato varieties for your balcony garden and enjoy a bountiful harvest of delicious, homegrown tomatoes.

Preparing Your Balcony Garden for Tomatoes

Before you start growing tomatoes on your balcony, there are a few things you need to do to prepare your garden. Here are some tips to help you get started:

1. Choose the Right Container

Tomatoes require a lot of space to grow, so it’s important to choose the right container. A 5-7 gallon container is recommended at a minimum, but you can go bigger if you have the space. Make sure your container has drainage holes to prevent water from building up and drowning your plants.

2. Select the Right Soil

Tomatoes need well-draining soil that is rich in nutrients. You can buy pre-mixed potting soil or make your own by mixing equal parts of compost, peat moss, and vermiculite. Avoid using garden soil, as it can contain pests and diseases that can harm your plants.

3. Provide Adequate Sunlight

Tomatoes need at least 6-8 hours of sunlight per day to grow and produce fruit. Make sure your balcony receives enough sunlight, or consider using grow lights if you don’t have access to natural sunlight.

4. Choose the Right Tomato Variety

When selecting a tomato variety for your balcony garden, choose determinate varieties that don’t grow too tall and are more compact. Some good options include cherry tomatoes, patio tomatoes, and bush tomatoes.

5. Water Your Plants Regularly

Tomatoes need consistent moisture to grow and produce fruit. Water your plants regularly, making sure the soil stays moist but not waterlogged. Consider using a self-watering container or drip irrigation system to make watering easier.

By following these tips, you’ll be well on your way to growing delicious tomatoes on your balcony. With a little bit of care and attention, you can enjoy fresh, homegrown tomatoes all season long!

Planting and Caring for Your Tomato Plants

Tomatoes are a popular choice for balcony gardens as they are easy to grow and produce a bountiful harvest. However, to ensure that your tomato plants thrive, it is important to plant and care for them correctly.

Planting Your Tomato Plants

To plant your tomato plants, follow these simple steps:

  1. Choose the right containers: Select containers that are at least 18 inches deep and wide, and have drainage holes. You can use plastic, clay, or ceramic pots.
  2. Fill the containers with a high-quality potting mix: Use a mix that is specifically formulated for container gardening and is rich in nutrients.
  3. Plant the tomato plants at the correct depth: Plant your tomato plants deep, burying the stem up to the first set of leaves. This will encourage strong root growth and a sturdy plant.
  4. Water regularly, making sure the soil doesn’t dry out: Tomatoes need consistent moisture to grow well. Water your plants deeply once a week or more often if the weather is hot and dry.
  5. Fertilize the plants every few weeks: Use a balanced fertilizer that is high in phosphorus and potassium to encourage healthy growth and fruit production.
  6. Protect the plants from pests and diseases: Keep an eye out for common tomato pests like aphids, whiteflies, and hornworms, and treat them promptly with insecticidal soap or neem oil.

Caring for Your Tomato Plants

Once your tomato plants are established, it is important to care for them properly to ensure a healthy harvest. Here are some tips:

  1. Provide support: Most tomato varieties need support to keep their heavy fruit off the ground. Use stakes, cages, or trellises to keep your plants upright.
  2. Prune regularly: Remove the suckers that grow in the crotch between the main stem and the branches to encourage larger fruit and a healthier plant.
  3. Water consistently: Keep the soil consistently moist, but not waterlogged. Tomatoes need about 1-2 inches of water per week.
  4. Harvest regularly: Pick your tomatoes when they are fully ripe to encourage more fruit production. Regular harvesting also prevents overripe tomatoes from attracting pests.

By following these simple steps, you can enjoy a bountiful harvest of delicious, homegrown tomatoes from your balcony garden.

Harvesting and Storing Your Tomatoes

Harvesting your balcony garden tomatoes at the right time is crucial to ensure that they are sweet, juicy, and full of flavor. Here are some tips to help you harvest your tomatoes like a pro:

  • Pick your tomatoes when they are fully ripe. Ripe tomatoes are usually red, although some varieties may be yellow, orange, or green when ripe. They should be firm but slightly soft to the touch and should come off the vine easily when you gently tug on them.
  • Harvest your tomatoes in the morning when the fruit is cool and the sun is not too intense. This will help the tomatoes retain their flavor and texture.
  • Use a sharp pair of scissors or pruning shears to cut the tomato stem about 1/4 inch above the fruit. Do not twist or pull the fruit off the vine, as this can damage the stem and cause the fruit to spoil more quickly.

Once you have harvested your tomatoes, it’s important to store them properly to ensure that they stay fresh and flavorful for as long as possible. Here are some tips for storing your balcony garden tomatoes:

  • Store your tomatoes at room temperature, away from direct sunlight. Do not refrigerate them, as this can cause the fruit to lose flavor and texture.
  • If you have a lot of tomatoes, you can store them in a single layer in a shallow box or basket. Be sure to check them regularly and remove any that are starting to spoil.
  • If you only have a few tomatoes, you can store them in a paper bag with a ripe banana or apple. The ethylene gas produced by the banana or apple will help the tomatoes ripen more quickly.

By following these tips, you can enjoy delicious, homegrown tomatoes from your balcony garden all season long.

Frequently Asked Questions: Tomatoes in Your Balcony Garden

Can cherry tomatoes grow in pots?

Yes, cherry tomatoes can grow in pots. In fact, they are one of the best types of tomatoes to grow on a balcony because they are compact and do not require as much space as other tomato varieties. Cherry tomatoes also tend to be more disease-resistant than other types of tomatoes.

What is the best tomato plant for balcony gardens?

Determinate tomato plants are the best type of tomato plant for balcony gardens. They are compact and bushy, making them ideal for small spaces. Determinate tomato plants also produce their fruit all at once, which makes them easier to manage and harvest.

How do you choose the right size container for growing tomatoes?

The size of the container you need for growing tomatoes depends on the variety of tomato you are growing. A general rule of thumb is to choose a container that is at least 18 inches in diameter and 24 inches deep for most tomato varieties. However, if you are growing a larger tomato variety, you may need a container that is even larger.

What is the best fertilizer for tomatoes grown in pots?

Tomatoes grown in pots require regular fertilization to thrive. A balanced fertilizer that contains equal amounts of nitrogen, phosphorus, and potassium is the best option for growing tomatoes in pots. You can also use organic fertilizers, such as compost or fish emulsion, to provide your tomato plants with the nutrients they need.

How do you support tomato plants in containers?

Tomato plants grown in containers require support to prevent them from toppling over as they grow. You can use a tomato cage or a stake to support your tomato plants. Make sure you install the support system when you plant the tomato seedling, so you do not disturb the roots later on.

How often should you water tomatoes grown in pots?

Tomatoes grown in pots require regular watering to thrive. You should water your tomato plants deeply once or twice a week, depending on the weather conditions. Make sure the soil is moist but not waterlogged. Overwatering can lead to root rot, which can kill your tomato plants.

For some great information about a vertical tomato garden, take a look at this article, “How to Set Up a Gorgeous Vertical Tomato Garden”. (source: minnetonkaorchards.com).

Find Your Inner Peace With A DIY Zen Balcony Garden

Discover how to create a calming outdoor space with a DIY zen balcony garden. Our guide will show you how to transform your balcony into a peaceful oasis, perfect for relaxation and meditation.

The Ultimate Guide to Splitting Your Split Rock Plant

Welcome to our article about splitting a Split Rock plant. If you’re a fan of succulents, you may be familiar with the Split Rock plant, also known as Pleiospilos nelii. This unique plant is named for its distinctive appearance, which resembles a small rock that has been split in half. The Split Rock plant is a popular choice for indoor gardens and is relatively easy to care for. They do like dry, arid, and semi-arid climates best. They are good for regions 9-11 or as indoor plants with plenty of indirect sunlight. Check out the USDA Plant Hardiness Zone Map (source: planthardiness.ars.usda.gov)

Splitting your Split Rock plant involves separating the plant into two or more sections, each of which can grow into a new plant. This process is relatively simple and can be done with just a few tools. However, it’s important to take care when splitting your plant to avoid damaging the roots or causing stress to the plant. With the right technique and a little bit of patience, you can split your Split Rock plant and create a beautiful new addition to your collection.

Splitting Your Split Rock Plant

Know when it's time for splitting your Split Rock Plant.

If your Split Rock plant is outgrowing its current pot or you want to propagate it, splitting the plant can be a great option. Splitting your Split Rock plant involves dividing the plant into two or more sections and replanting them. Here are the steps to follow:

Preparing the Plant

Before you start splitting your Split Rock plant, you need to prepare it. Here are the steps to follow:

  1. Water the plant a few days before splitting it. This will make it easier to remove from the pot and less likely to break during the process.
  2. Choose a pot that is at least 3.5 to 4 inches deep with a hole in the bottom for proper drainage.
  3. Prepare the soil: a) by blending a 25% cactus mix and 75% pumice or perlite. This will provide good drainage for the plant; b) is a mix of 1 part peat moss to 1 part loam to 2 parts coarse sand with small pebbles added for drainage; c) another is a mineral mix that is low in organic matter.

Splitting the Plant

While splitting a Split Rock plant is a fun DIIY project, even more fun is giving them all a new home!

Once you have prepared the plant, it’s time to split it. Here are the steps to follow:

  1. Remove the plant from its pot and gently remove any excess soil from the roots.
  2. Look for natural splits or divisions in the plant. If there are none, create a split by carefully pulling the plant apart at its base.
  3. Use a clean, sharp knife to cut the plant into sections. Each section should have its own roots and at least one set of leaves.
  4. Be careful not to damage the roots or leaves during the process.

Replanting the Divisions

After you have split the plant, it’s time to replant the divisions. Here are the steps to follow:

  1. Fill the new pot with the prepared soil and make a hole in the center.
  2. Place each division in its own hole and gently pack the soil around it.
  3. Water the plant lightly and place it in a bright, sunny spot.
  4. Wait a few days before watering the plant again to allow it to adjust to its new environment.

When Not to Split Your Split Rock Plant

It is generally not recommended to split a split rock plant if it is not actively growing or if it is in poor health. Splitting a plant that is not actively growing or is unhealthy can cause additional stress to the plant and may not result in successful propagation. It is also not recommended to split a split rock plant during the winter months, as this is typically a period of dormancy for the plant.

Additionally, splitting a plant that is too small may not be advisable, as it may not have enough energy reserves to support multiple plants. It is important to assess the health and growth patterns of the plant before attempting to split it. If you are unsure whether your split rock plant is ready to be split, it may be best to consult a plant care expert or horticulturist for guidance.

Conclusion

Splitting your Split Rock plant can be a great way to propagate the plant or keep it from outgrowing its current pot. By following these steps, you can successfully split your plant and enjoy its unique beauty in multiple locations. For more information about the Split Rock Plant, see our Article, “Split Rock Plant: The Unique and Easy-to-Care-For Succulent“. It’s truly one of our favorites!

Best Gardening Supplies: Tips for Finding the Right Tools

Download the Balcony Garden Paradise Tools and Supplies Checklist Today! ðŸŒŧðŸŒŋ

If you’re looking to take your gardening game to the next level, investing in the best gardening supplies is a must. Whether you’re a seasoned gardener or just starting out, having the right tools and equipment can make all the difference in the success of your garden. From high-quality pruners to nutrient-rich fertilizers, the right supplies can help you achieve a lush and thriving garden.

When it comes to selecting the best gardening supplies, it’s important to consider your specific needs and goals. Are you looking to grow a vegetable garden? Or perhaps you’re interested in cultivating a beautiful flower garden? Whatever your gardening aspirations may be, there are a variety of supplies available to help you achieve your desired results. In this article, we’ll explore some of the best gardening supplies on the market, so you can make informed decisions about which products are right for you.

Tools and Equipment

When it comes to gardening, having the right tools and equipment can make all the difference. In this section, we’ll explore the best gardening supplies for hand tools, power tools, watering equipment, and pest control.

Hand Tools

Don't forget your hand tools, watering cans, and sprayers.  They are some of the very best gardening supplies.

Hand tools are essential for any gardener, whether you’re planting, pruning, or weeding. Here are some of the best hand tools for your gardening needs:

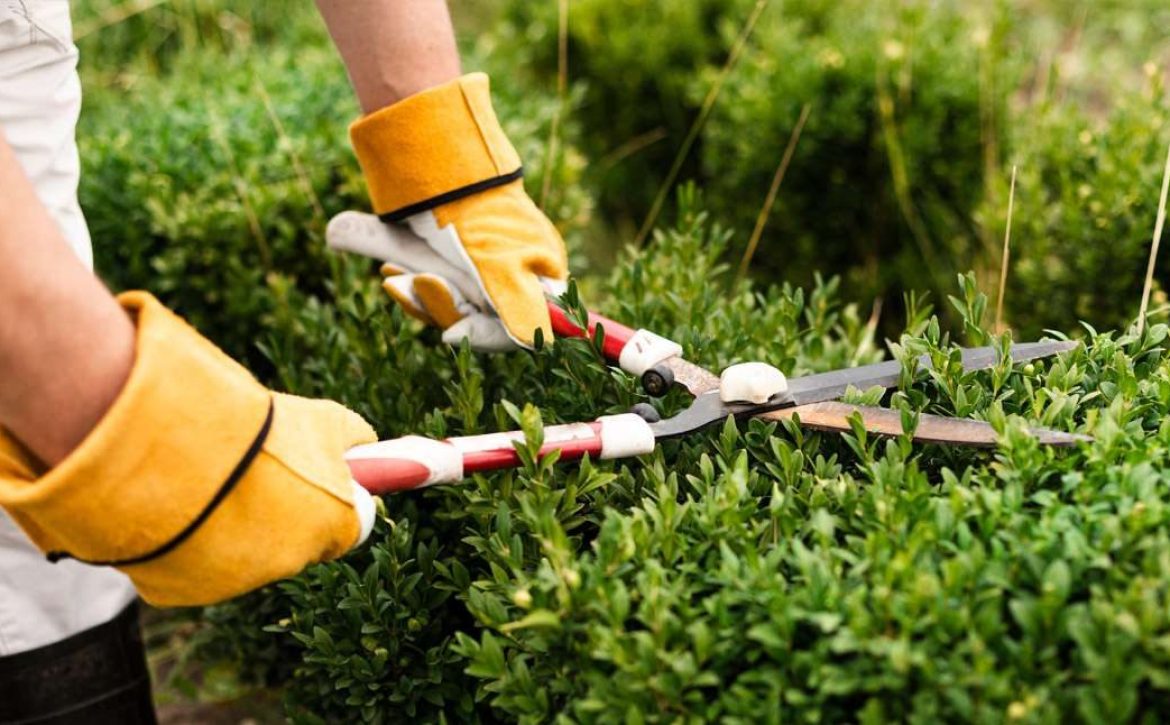
  • Pruning shears: Felco #6 Pruning Shears are a favorite among expert gardeners for their precision and durability.
  • Hand rake: Fiskars Hand Rake is ergonomically designed to reduce hand and wrist fatigue while cultivating.
  • Trowel: The DeWit Forged Trowel is made from high-quality carbon steel and is perfect for digging and planting.
  • Cultivator: A cultivator is a handheld tool that can be used to loosen soil and remove weeds from small garden beds or pots.

Power Tools

Power tools can save you time and energy when it comes to your balcony gardening tasks. Here are some of the best power tools for your gardening needs:

  • Cordless Drill: This versatile tool can be used for a variety of tasks, such as drilling holes in pots for drainage or installing brackets for hanging baskets.
  • Electric Pruner: An electric pruner can make quick work of cutting back small branches or stems on plants.

Watering Equipment

Proper watering is essential for a healthy garden. Here are some of the best watering equipment options for your garden:

  • Hose: The Flexzilla Garden Hose is durable and kink-resistant, making it a great choice for watering your garden.
  • Watering can: The Haws Traditional Watering Can is made from high-quality galvanized steel and is perfect for watering plants and flowers.

Pest Control

Keeping pests at bay is important for the health of your garden. Here are some of the best pest control options for your garden:

  • Insecticide: The Bonide Insecticide Concentrate is a top-rated choice for its effectiveness against a wide range of garden pests.
  • Bird netting: The Agfabric Bird Netting is a great choice for protecting your garden from birds and other animals.
  • Trap: The RESCUE! Disposable Yellow Jacket Trap is a great choice for controlling yellow jackets and other flying insects.

In summary, having the best gardening supplies can make all the difference when it comes to maintaining a healthy and beautiful garden. From hand tools to power tools, watering equipment, and pest control, there are plenty of options to choose from to suit your gardening needs.

Soil and Fertilizers

When it comes to gardening, having the right soil and fertilizers is essential for growing healthy and thriving plants. In this section, we’ll cover the best gardening supplies for soil and fertilizers, including potting soil, compost and mulch, and fertilizers.

Potting Soil

Potting soil is a crucial component for container gardening. The right potting soil can provide the necessary nutrients and drainage for your plants to grow healthy and strong. When choosing a potting soil, look for a mix that includes peat moss, perlite, vermiculite, and compost. These ingredients will help create a well-draining soil that retains moisture.

Here are some of the best potting soils:

ProductKey Features
PittMoss PlentifulPeat-free blend with recycled paper for added sustainability
Miracle-Gro Potting MixContains plant food to feed plants for up to six months
FoxFarm Ocean Forest Potting SoilContains earthworm castings, bat guano, and sea-going fish and crab meal for added nutrients

Compost and Mulch

Compost and mulch are natural fertilizers that can help improve soil structure, retain moisture, and reduce weed growth. Compost is made from decomposed organic matter, while mulch is made from shredded leaves, bark, or straw.

Here are some of the best compost and mulch options:

  • Compost: Homemade compost is the best option, but if you don’t have the time or resources, you can purchase compost from a garden center or nursery. Look for compost that is made from a variety of organic materials, such as food scraps, leaves, and grass clippings.
  • Mulch: Mulch can be made from a variety of materials, including shredded leaves, bark, or straw. Look for a mulch that is free of weed seeds and is at least two inches thick.

Fertilizers

Fertilizers provide plants with the necessary nutrients to grow and thrive. When choosing a fertilizer, look for one that contains nitrogen, phosphorus, and potassium (NPK). The NPK ratio will vary depending on the type of plants you are growing.

Here are some of the best fertilizers:

ProductKey Features
Espoma Organic All-Purpose FertilizerContains a blend of organic materials and inorganic minerals
Jobe’s Organics Vegetable & Tomato FertilizerContains beneficial microbes and is safe for pets and children
Dr. Earth Organic 5 Tomato, Vegetable & Herb FertilizerContains a blend of fish bone meal, kelp meal, and alfalfa meal for added nutrients

By using the best gardening supplies for soil and fertilizers, you can ensure that your plants have the necessary nutrients and growing conditions to thrive.

Seeds and Plants

When it comes to gardening, starting with the right seeds or plants is crucial. Here are the best gardening supplies for seeds and plants.

Vegetable Seeds

Growing your own vegetables is a rewarding and healthy experience. Some of the best places to buy vegetable seeds online include Eden Brothers, Botanical Interests, and Baker Creek Heirloom Seeds. These companies offer a wide selection of non-GMO and heirloom seeds that are perfect for home gardens.

When choosing vegetable seeds, consider factors such as your climate, soil type, and the amount of sunlight your garden receives. Some popular vegetable seeds to consider include tomatoes, peppers, cucumbers, and lettuce.

Flower Seeds

Adding some color and beauty to your garden is easy with flower seeds. Some of the best places to buy flower seeds online include Burpee, Johnny’s Selected Seeds, and American Meadows. These companies offer a wide selection of flower seeds that are perfect for home gardens.

When choosing flower seeds, consider factors such as your climate, soil type, and the amount of sunlight your garden receives. Some popular flower seeds to consider include marigolds, sunflowers, zinnias, and poppies.

Seed Starting Kits

If you’re new to gardening or want to simplify the seed starting process, consider using a seed starting kit. Some of the best seed starting kits include the Burpee Seed Starting Kit, the Jiffy Professional Greenhouse Kit, and the AeroGarden Harvest Elite.

Seed starting kits typically come with everything you need to start your seeds indoors, including trays, soil, and a cover. They’re a great option for those who don’t have a lot of space or want to get a head start on their gardening season.

Live Plants

If you don’t want to start your plants from seeds, consider buying live plants instead. Some of the best places to buy live plants online include Home Depot, Lowe’s, and Amazon. These companies offer a wide selection of plants that are perfect for home gardens.

When choosing live plants, consider factors such as your climate, soil type, and the amount of sunlight your garden receives. Some popular live plants to consider include tomatoes, peppers, herbs, and flowers.

Overall, whether you choose to start your plants from seeds or buy live plants, there are plenty of options available to help you create the garden of your dreams.

Containers and Raised Beds

If you’re looking for the best gardening supplies to grow your plants, containers and raised beds are some of the most popular options. Containers can be used for small spaces, while raised beds can provide a larger area for planting. Here are some of the best options for containers and raised beds.

Pots and Planters

Pots and planters are great for growing plants in small spaces like balconies or patios. They come in a variety of sizes, materials, and designs. Here are some of the best options for pots and planters:

  • Terracotta pots: These pots are made of clay and are great for plants that prefer well-drained soil. They are also affordable and come in a range of sizes.
  • Self-watering planters: These planters have a reservoir at the bottom that holds water, which is then absorbed by the plant as needed. They are great for busy gardeners who don’t have time to water their plants regularly.
  • Hanging baskets: These baskets are great for plants that like to trail, like petunias or ivy. They can be hung from a hook or railing and come in a variety of materials like wire, plastic, or wicker.

Window Boxes

A balcony garden box is one of the best choices in gardening supplies.

Window boxes are a great way to add some greenery to your windowsill or balcony railing. They come in a variety of materials like wood, metal, or plastic. Here are some of the best options for window boxes:

  • Cedar window boxes: These boxes are made of cedar wood, which is naturally rot-resistant. They are also lightweight and easy to install.
  • Metal window boxes: These boxes are made of metal and come in a variety of finishes like copper or wrought iron. They are durable and can add a touch of elegance to your home.
  • Plastic window boxes: These boxes are affordable and come in a variety of colors and designs. They are also lightweight and easy to clean.

Accessories and Decor

When it comes to gardening, having the right accessories and decor can make all the difference. Not only can they add to the aesthetic appeal of your garden, but they can also make your gardening experience more enjoyable and efficient. Here are some of the best gardening supplies in the accessories and decor category.

Garden Decor

Adding some decor to your garden can really make it stand out. From garden statues to solar lights, there are plenty of options to choose from. Here are a few of the best:

  • Garden statues: Add some personality to your balcony garden with a garden statue. Whether you prefer a classic gnome or a more modern sculpture, there are plenty of options to choose from.
  • Solar lights: Illuminate your garden at night with solar lights. They’re environmentally friendly and easy to install, making them a great addition to any garden.
  • Wind chimes: Not only do wind chimes add a pleasant sound to your garden, but they can also deter pests and animals.

Garden Clothing and Accessories

Gardening can be a messy business, so having the right clothing and accessories can make a big difference. Here are some of the best gardening supplies in this category:

  • Gardening gloves: Protect your hands from dirt, thorns, and other hazards with a good pair of gardening gloves. Look for gloves that are durable, breathable, and comfortable.
  • Knee pads: If you spend a lot of time kneeling in your garden, knee pads can help prevent soreness and injury.
  • Garden apron: Keep your tools and supplies organized with a garden apron. Look for one with plenty of pockets and a sturdy design.

Gardening Books and Magazines

Whether you’re a seasoned gardener or just starting out, there’s always more to learn. Gardening books and magazines can provide valuable information and inspiration. Here are a few of the best:

  • The Vegetable Gardener’s Bible by Edward C. Smith: This comprehensive guide covers everything you need to know about growing vegetables, from soil preparation to harvesting.
  • Fine Gardening magazine: This magazine is a great resource for gardeners of all skill levels. It features articles on a wide variety of topics, from plant care to garden design.
  • The Well-Tempered Garden by Christopher Lloyd: This classic book is a must-read for any serious gardener. It covers a wide range of gardening topics, from plant selection to garden maintenance.

With these gardening accessories and decor, you can take your garden to the next level. Whether you’re looking to add some personality to your garden or make your gardening experience more comfortable, these best gardening supplies are sure to help. Refer to this article, “10 Things to Consider When Balcony Gardening” for more balcony gardening information. (source: almanac.com)

Split Rock Plant: The Unique and Easy-to-Care-For Succulent ðŸŒĩ

We thought it might be fun to create a focus post every week on one specific balcony garden plant. As with all of our articles, remember to think about conditions on your balcony or patio as well as verify whether it’s a good choice if you have a family pet friend. So, on to our first feature plant, the loveable Split Rock.

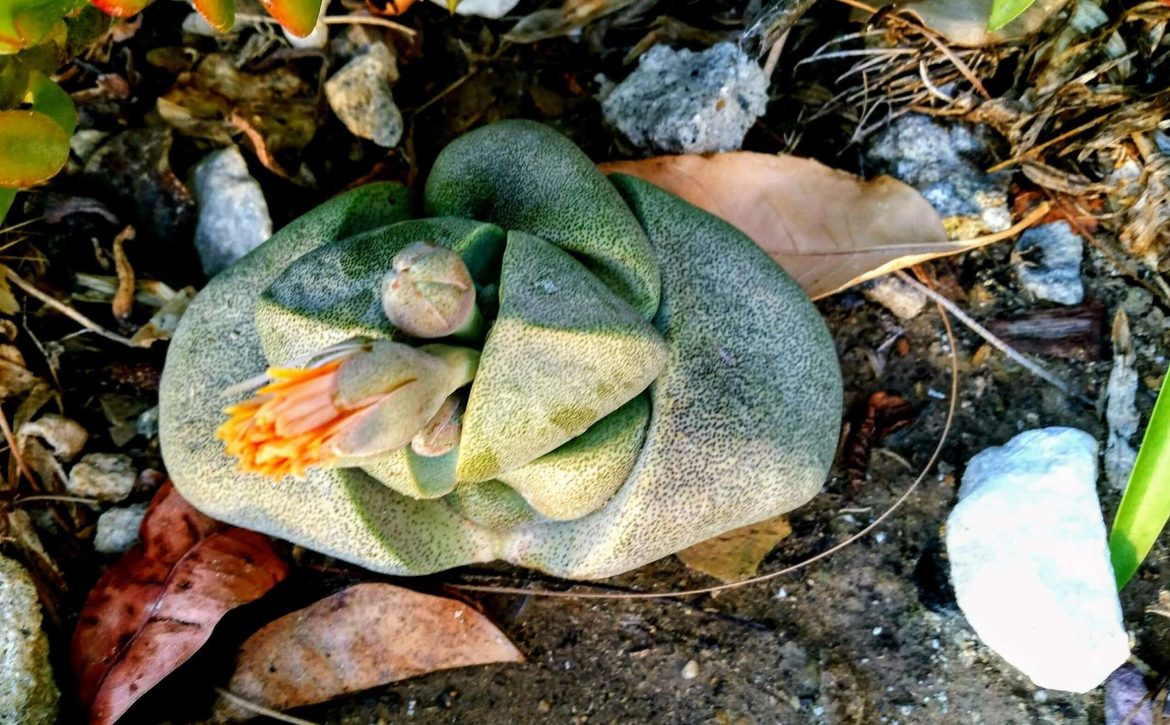
The Split rock plant, also known as Pleiospilos nelii, is a unique succulent native to South Africa. This plant is characterized by its gray-green stone-like leaves separated by a cleft down the center, giving it the appearance of a split rock. Split rocks are relatively small, growing only a few inches in height, making them perfect for indoor gardening.

If you’re looking for a low-maintenance plant that is both visually striking and easy to care for, this plant is an excellent choice. These plants require minimal watering and can thrive in bright, indirect light. With proper care, split rock plants can produce beautiful yellow or white flowers that bloom in the summer months.

Whether you’re a seasoned gardener or a beginner, the split rock is a fascinating addition to any collection. In this article, we will explore everything you need to know about growing and caring for split rock plants, from their unique characteristics to their preferred growing conditions. So let’s dive in and discover the world of split rock plants together. If you have a chance, check out this video by “Sucs for You!” (source: youtube.com) for a brief overview.

Overview of the Split Rock Plant

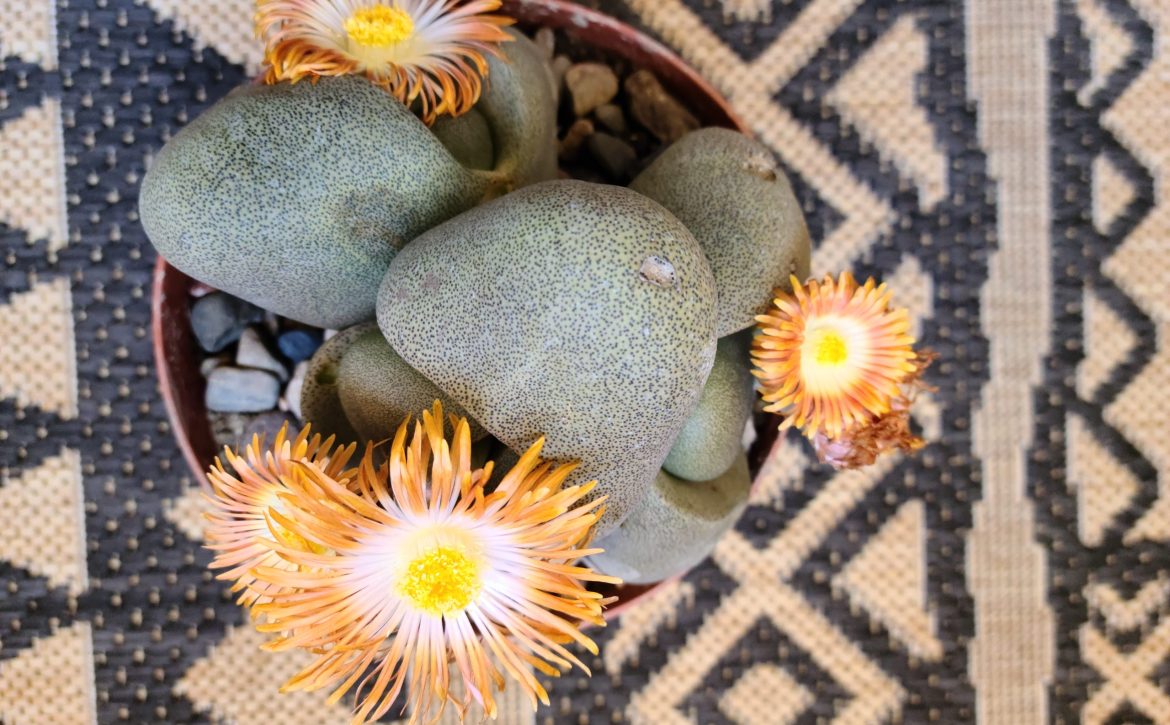
The split rock plant is aptly named.

Here at Balcony Garden Paradise, we are very fond of this unique and fascinating plant. In this section, we’ll provide an overview of this plant, including its description, habitat and range, and uses.

Description of Split Rock Plant

The split rock plant, also known as Pleiospilos nelii, is a small succulent that is native to South Africa. It is a perennial plant that has two to four gray-green leaves that are separated by a cleft down the center. The leaves are thick and fleshy, and have a stone-like appearance, which gives the plant its common name.

Split Rocks produce spectacular flowers that have a coconutty smell. The flowers are yellow or white, and they bloom in the fall or spring. The plant is easy to care for and can be a great addition to any succulent collection.

Habitat and Range

The split rock plant is native to South Africa and thrives in arid and semi-arid environments. It prefers bright, unmodified light and can be cultivated outdoors in warmer climates, in USDA regions 9-11.

Uses

The split rock plant is primarily grown as an ornamental plant. It is a popular choice among succulent enthusiasts due to its unique appearance and low maintenance requirements. The plant can be grown in pots or in rock gardens, and it can be used to create interesting and eye-catching displays.

In addition to its ornamental uses, this unique plant has some medicinal properties. It has been used in traditional medicine to treat a variety of ailments, including fever, headaches, and stomach problems. However, more research is needed to determine the effectiveness of these treatments.

The Split Rock is a fascinating succulent that can be a great addition to any collection. With its low maintenance requirements and interesting appearance, it is a great choice for both beginner and experienced succulent growers.

Cultivation of the Split Rock Plant

Propagation

The split rock plant can be propagated through seeds or by division. To propagate through seeds, collect the seeds from the plant after the flowering season. Soak the seeds in water for 24 hours before planting them in sandy soil. Keep the soil damp but not too wet until the seeds germinate.

To propagate through division, wait until the plant has produced offsets. Carefully remove the offsets and plant them in sandy soil. Water the offsets sparingly until they have established roots.

Growing Conditions

Split rock plants prefer bright, unmodified light and dry, arid, and semi-arid climates. They thrive in the spring and autumn seasons and detest cold weather. When cultivated outdoors, split rock plants perform best in warmer climates (in 9-11 USDA regions).

When dealing with a split rock plant, it is recommended to use a soil mix consisting of 1 part peat moss to 1 part loam to 2 parts coarse sand with small pebbles added to ensure good drainage. Very little water is needed during the growing season, and you do not fertilize the plants. Make sure NOT to water on the plant itself. Water directly in the soil.

Pests and Diseases

Split rock plants are generally pest and disease-free. However, they can be susceptible to mealybugs and spider mites. To prevent infestations, inspect the plant regularly and remove any affected areas immediately.

Overwatering can cause root rot, which can be fatal for the plant. To prevent root rot, make sure the soil is well-draining and avoid watering the plant too frequently.

In conclusion, split rock plants are relatively easy to propagate and care for. By following the proper growing conditions and taking preventative measures against pests and diseases, you can enjoy the beauty of this unique succulent for years to come.

Care and Maintenance of a Split Rock

Taking care of a split rock is easy, and it only requires minimal maintenance. Here are some tips on how to keep your plant healthy and thriving.

Watering

Split rock are drought-tolerant succulents that can survive long periods without water. Therefore, it’s essential to avoid overwatering your plant, as this can lead to root rot. We recommend watering your split rock plant once a month during the growing season (spring and summer) and once every two months during the dormant season (fall and winter).

When watering your split rock plant, make sure to soak the soil thoroughly and let the excess water drain out of the pot’s bottom. Avoid getting water on the plant’s leaves or stem, as this can cause rot. We also recommend using a well-draining soil mix that allows excess water to drain away quickly.

Fertilizing

Split rock do not require frequent fertilization, but you can give them a boost during the growing season (spring and summer) by applying a balanced, water-soluble fertilizer. We recommend diluting the fertilizer to half-strength and applying it once a month.

Avoid fertilizing your split rock plant during the dormant season (fall and winter), as this can cause the plant to grow too quickly and become weak and leggy.

Pruning

Split rock plants do not require pruning, but you can remove any dead or damaged leaves or stems to keep your plant looking neat and tidy. We recommend using clean, sharp scissors or pruning shears to avoid damaging the plant.

In conclusion, taking care of a split rock plant is easy and straightforward. By following these simple tips, you can keep your plant healthy and thriving for years to come.

Harvesting and Storage of Split Rock Plant

When to Harvest

You should harvest a Split rock when the flowers have dried up and the seed pods have turned brown. The timing of the harvest is crucial, as harvesting too early or too late can result in poor-quality seeds. You should aim to harvest the seed pods when they have turned brown and are starting to split open. You should also make sure to harvest the seed pods before they fall off the plant.

How to Harvest

To harvest Split Rock, carefully remove the seed pods from the plant using a pair of scissors or a sharp knife. Make sure to handle the seed pods gently to avoid damaging them. Once you have harvested the seed pods, place them in a dry, well-ventilated area to allow them to dry out completely. You should make sure to remove any debris or plant material from the seed pods before storing them.

Storage

To store Split rock seeds, you should place them in an airtight container, such as a glass jar or plastic bag. Make sure to label the container with the date of harvest and the variety of Split rock. Store the seeds in a cool, dry place, away from direct sunlight and moisture. Split rock seeds can remain viable for several years if stored properly.

Harvesting and storing Split rock seeds is a simple process that requires careful timing and handling. By following the guidelines outlined above, you can ensure that you harvest high-quality seeds that will produce healthy, vigorous plants.

Conclusion

As you can see, the split rock is aptly named.
As you can see, the split rock plant is aptly named!

In this article, we have learned that the split rock, also known as Pleiospilos Nelii, is a fascinating succulent plant native to South Africa. This plant is known for its unique appearance, with two to four gray-green stone-looking leaves separated by a cleft down the center.

We have also learned that the plant is a relatively easy plant to care for, making it an excellent choice for novice growers. It can thrive in semi-arid and arid areas, making it perfect for rock gardens or windowsill gardens.

To care for a split rock, we recommend providing it with well-draining soil, plenty of sunlight, and infrequent watering. Overwatering can be detrimental to the plant’s health, so it’s essential to allow the soil to dry out between watering sessions.

In addition, the split rock is a slow-growing plant that can take several years to reach its full size. However, once it reaches maturity, it can produce beautiful yellow or white flowers that are a sight to behold.

In summary, the split rock plant is an excellent addition to any succulent collection. Its unique appearance, easy care requirements, and beautiful flowers make it a plant that we highly recommend for both novice and experienced growers alike. To find out more about succulents and more sustainable plants, read our article “10 Best Water-Conserving Balcony Garden Plants“.

Best Eco-Friendly Garden Plants for Your Balcony

Our mission is to provide our customers with responsive service and unsurpassed quality and value at a very competitive price…

Social media & sharing icons powered by UltimatelySocial
Facebook
fb-share-icon